This document covers the customization of WeeWX. It assumes that you have read, and are reasonably familiar with, the Users Guide.
The introduction contains an overview of the architecture. If you are only interested in customizing the generated reports you can probably skip the introduction and proceed directly to the section Customizing reports. With this approach you can easily add new plot images, change the titles of images, change the units used in the reports, and so on.
However, if your goal is a specialized application, such as adding alarms, RSS feeds, etc., then it would be worth your while to read about the internal architecture.
Most of the guide applies to any hardware, but the exact data types are hardware-specific. See the WeeWX Hardware Guide for details of how different observation types are handled by different types hardware.
Warning!
WeeWX is still an experimental system and, as such,
its internal design is subject to change. Future upgrades may break any customizations
you have done, particularly if they involve the API (skin customizations tend to be
more stable).
Introduction
Overall system architecture
Below is a brief overview of the WeeWX system architecture, which is covered in much more detail in the rest of this document.

- A WeeWX process normally handles the monitoring of one station — e.g. a weather station. The process is configured using options in a configuration file, typically called weewx.conf.
- A WeeWX process has at most one "driver" to communicate with the station hardware and receive "high resolution" (i.e. every few seconds) measurement data in the form of LOOP packets. The driver is single-threaded and blocking, so no more than one driver can run in a WeeWX process.
- LOOP packets may contain arbitrary data from the station/driver in the form of a Python dictionary. Each LOOP packet must contain a time stamp, and a unit system, in addition to any number of observations, such as temperature or humidity. For extensive types, such as rain, the packet contains the total amount of rain that fell during the observation period.
- WeeWX then compiles these LOOP packets into regularly spaced "archive records." For most types, the archive record contains the average value seen in all of the LOOP packets over the archive interval (typically 5 minutes). For extensive types, such as rain, it is the sum of all values over the archive interval.
- Internally, the WeeWX engine uses a pipeline architecture, consisting of many services. Services bind to events of interest, such as new LOOP packets, or new archive records. Events are then run down the pipeline in order — services at the top of the pipeline act on the data before services farther down the pipe.
- Services can do things such as check the data quality, apply corrections, or save data to a database. Users can easily add new services.
- WeeWX includes an ability to customize behavior by installing extensions. Extensions may consist of one or more drivers, services, and/or skins, all in an easy-to-install package.
Data architecture
WeeWX is data-driven. When the sensors spit out some data, WeeWX does something. The "something" might be to print out the data, or to generate an HTML report, or to use FTP to copy a report to a web server, or to perform some calculations using the data.
A driver is Python code that communicates with the hardware. The driver reads data from a serial port or a device on the USB or a network interface. It handles any decoding of raw bits and bytes, and puts the resulting data into LOOP packets. The drivers for some kinds of hardware (most notably, Davis Vantage) are capable of emitting archive records as well.
In addition to the primary observation types such as temperature, humidity, or solar radiation, there are also many useful dependent types, such as wind chill, heat index, or ET, which are calculated from the primary data. The firmware in some weather stations are capable of doing many of these calculations on their own. For the rest, should you choose to do so, the WeeWX service StdWXCalculate can fill in the gaps. Sometimes the firmware simply does it wrong, and you may choose to have WeeWX do the calculation, despite the type's presence in LOOP packets.
LOOP packets vs. archive records
Generally, there are two types of data that flow through WeeWX: LOOP packets, and archive records. Both are represented as Python dictionaries.
LOOP packets
LOOP packets are the raw data generated by the device driver. They get their name from the Davis Instruments documentation. For some devices they are generated at rigid intervals, such as every 2 seconds for the Davis Vantage series, for others, irregularly, every 20 or 30 seconds or so. LOOP packets may or may not contain all the data types. For example, a packet may contain only temperature data, another only barometric data, etc. These kinds of packet are called partial record packets. By contrast, other types of hardware (notably the Vantage series), every LOOP packet contains every data type.
In summary, LOOP packets can be highly irregular, but they come in frequently.
Archive records
By contrast, archive records are highly regular. They are generated at regular intervals (generally every 5 to 30 minutes), and all contain the same data types. They represent an aggregation of the LOOP packets over the archive interval. The exact kind of aggregation depends on the data type. For example, for temperature, it's generally the average temperature over the interval. For rain, it's the sum of rain over the interval. For battery status it's the last value in the interval.
Some hardware is capable of generating their own archive records (the Davis Vantage and Oregon Scientific WMR200, for example), but for hardware that cannot, WeeWX generates them.
It is the archive data that is put in the SQL database, although, occasionally, the LOOP packets can be useful (such as for the Weather Underground's "Rapidfire" mode).
What to customize
For configuration changes, such as which skins to use, or enabling posts to the Weather Underground, simply modify the WeeWX configuration file weewx.conf. Any changes you make will be preserved during an upgrade.
Customization of reports may require changes to a skin configuration file skin.conf or template files ending in .tmpl or .inc. Anything in the skins subdirectory is also preserved across upgrades.
You may choose to install one of the many third-party extensions that are available for WeeWX. These are typically installed in either the skins or user subdirectories, both of which are preserved across upgrades.
More advanced customizations may require new Python code or modifications of example code. These should be placed in the user directory, where they will be preserved across upgrades. For example, if you wish to modify one of the examples that comes with WeeWX, copy it from the examples directory to the user directory, then modify it there. This way, your modifications will not be touched if you upgrade.
For code that must run before anything else in WeeWX runs (for example, to set up an environment), put it in the file extensions.py in the user directory. It is always run before the WeeWX engine starts up. Because it is in the user subdirectory, it is preserved between upgrades.
Do I need to restart WeeWX?
If you make a change in weewx.conf, you will need to restart WeeWX.
If you modify Python code in the user directory or elsewhere, you will need to restart WeeWX.
If you install an extension, you will need to restart WeeWX.
If you make a change to a template or to a skin.conf file, you do not need to restart WeeWX. The change will be adopted at the next reporting cycle, typically at the end of an archive interval.
The utility wee_reports
If you make changes, how do you know what the results will look like? You could just run WeeWX and wait until the next reporting cycle kicks off but, depending on your archive interval, that could be a 30 minute wait or more.
The utility wee_reports allows you to run a report whenever you like. To use it, just run it from a command line, with the location of your configuration file weewx.conf as the first argument. Optionally, if you include a unix epoch timestamp as a second argument, then the report will use that as the "Current" time; otherwise, the time of the last record in the archive database will be used. Here is an example, using 1 May 2014 00:00 PDT as the "Current" time.
wee_reports weewx.conf 1398927600
For more information about wee_reports, see the Utilities Guide
The WeeWX service architecture
At a high-level, WeeWX consists of an engine class called StdEngine. It is responsible for loading services, then arranging for them to be called when key events occur, such as the arrival of LOOP or archive data. The default install of WeeWX includes the following services:
| Service | Function |
| weewx.engine.StdTimeSynch | Arrange to have the clock on the station synchronized at regular intervals. |
| weewx.engine.StdConvert | Converts the units of the input to a target unit system (such as US or Metric). |
| weewx.engine.StdCalibrate | Adjust new LOOP and archive packets using calibration expressions. |
| weewx.engine.StdQC | Check quality of incoming data, making sure values fall within a specified range. |
| weewx.wxservices.StdWXCalculate | Calculate any missing, derived weather observation types, such a dewpoint, windchill, or altimeter-corrected pressure. |
| weewx.engine.StdArchive | Archive any new data to the SQL databases. |
| weewx.restx.StdStationRegistry weewx.restx.StdWunderground weewx.restx.StdPWSweather weewx.restx.StdCWOP weewx.restx.StdWOW weewx.restx.StdAWEKAS |
Various RESTful services (simple stateless client-server protocols), such as the Weather Underground, CWOP, etc. Each launches its own, independent thread, which manages the post. |
| weewx.engine.StdPrint | Print out new LOOP and archive packets on the console. |
| weewx.engine.StdReport | Launch a new thread to do report processing after a new archive record arrives. Reports do things such as generate HTML or CSV files, generate images, or transfer files using FTP/rsync. |
It is easy to extend old services or to add new ones. The source distribution includes an example new service called MyAlarm, which sends an email when an arbitrary expression evaluates True. These advanced topics are covered later in the section Customizing the WeeWX service engine.
The standard reporting service, StdReport
For the moment, let us focus on the last service, weewx.engine.StdReport, the standard service for creating reports. This will be what most users will want to customize, even if it means just changing a few options.
Reports
The standard reporting service, StdReport, runs zero or more reports. The specific reports which get run are set in the configuration file weewx.conf, in section [StdReport].
The default distribution of WeeWX includes six reports:
| Report | Default functionality |
| SeasonsReport | Introduced with WeeWX V3.9, this report generates a single HTML file with day, week, month and year "to-date" summaries, as well as the plot images to go along with them. Buttons select which time scale the user wants. It also generates HTML files with more details on celestial bodies and statistics. Also generates NOAA monthly and yearly summaries. |
| SmartphoneReport | A simple report that generates an HTML file, which allows "drill down" to show more detail about observations. Suitable for smaller devices, such as smartphones. |
| MobileReport | A super simple HTML file that just shows the basics. Suitable for low-powered or bandwidth-constrained devices. |
| StandardReport | This is an older report that has been used for many years in WeeWX. It generates day, week, month and year "to-date" summaries in HTML, as well as the plot images to go along with them. Also generates NOAA monthly and yearly summaries. It typically loads faster than the SeasonsReport. |
| FTP | Transfer everything in the HTML_ROOT directory to a remote server using ftp. |
| RSYNC | Transfer everything in the HTML_ROOT directory to a remote server using the utility rsync. |
Note that the FTP and RSYNC "reports" are a funny kind of report in that it they do not actually generate anything. Instead, they use the reporting service engine to transfer files and folders to a remote server.
Skins
Each report has a skin associated with it. For most reports, the relationship with the skin is an obvious one: the skin contains the templates, any auxiliary files such as background GIFs or CSS style sheets, files with localization data, and a skin configuration file, skin.conf. If you will, the skin controls the look and feel of the report. Note that more than one report can use the same skin. For example, you might want to run a report that uses US Customary units, then run another report against the same skin, but using metric units and put the results in a different place. All this is possible by either overriding configuration options in the WeeWX configuration file or the skin configuration file.
Like all reports, the FTP and RSYNC "reports" also use a skin, and include a skin configuration file, although they are quite minimal.
Skins live in their own directory called skins, whose location is referred to as SKIN_ROOT.
SKIN_ROOT
The symbol SKIN_ROOT is a symbolic name to the location of the directory where your skins are located. It is not to be taken literally. Consult the directory layout table in the User's Guide for its exact location, dependent on how you installed WeeWX and what operating system you are using
Generators
To create their output, skins rely on one or more generators, which are what do the actual work, such as creating HTML files or plot images. Generators can also copy files around or FTP/rsync them to remote locations. The default install of WeeWX includes the following generators:
| Generator | Function |
| weewx.cheetahgenerator.CheetahGenerator | Generates files from templates, using the Cheetah template engine. Used to generate HTML and text files. |
| weewx.imagegenerator.ImageGenerator | Generates graph plots. |
| weewx.reportengine.FtpGenerator | Uploads data to a remote server using FTP. |
| weewx.reportengine.RsyncGenerator | Uploads data to a remote server using rsync. |
| weewx.reportengine.CopyGenerator | Copies files locally. |
Note that the three generators FtpGenerator, RsyncGenerator, and CopyGenerator do not actually generate anything having to do with the presentation layer. Instead, they just move files around.
Which generators are to be run for a given skin is specified in the skin's configuration file skin.conf, in section [Generators].
Templates
A template is a text file that is processed by a template engine to create a new file. WeeWX uses the Cheetah template engine. The generator weewx.cheetahgenerator.CheetahGenerator is responsible for running Cheetah at appropriate times.
A template may be used to generate HTML, XML, CSV, Javascript, or any other type of text file. A template typically contains variables that are replaced when creating the new file. Templates may also contain simple programming logic.
Each template file lives in the skin directory of the skin that uses it. By convention, a template file ends with the .tmpl extension. There are also template files that end with the .inc extension. These templates are included in other templates.
The database
WeeWX uses a single database to store and retrieve the records it needs. It can be implemented by using either SQLITE3, an open-source, lightweight SQL database, or MySQL, an open-source, full-featured database server.
Structure
Inside this database are several tables. The most important is the archive table, a big flat table, holding one record for each archive interval, keyed by dateTime, the time at the end of the archive interval. It looks something like this:
| dateTime | usUnits | interval | barometer | pressure | altimeter | inTemp | outTemp | ... |
| 1413937800 | 1 | 5 | 29.938 | null | null | 71.2 | 56.0 | ... |
| 1413938100 | 1 | 5 | 29.941 | null | null | 71.2 | 55.9 | ... |
| ... | ... | ... | ... | ... | ... | ... | ... | ... |
The first three columns are required. Here's what they mean:
| Name | Meaning |
| dateTime | The time at the end of the archive interval in unix epoch time. This is the primary key in the database. It must be unique, and it cannot be null. |
| usUnits | The unit system the record is in. It cannot be null. See the Appendix: Units for how these systems are encoded. |
| interval | The length of the archive interval in minutes. It cannot be null. |
In addition to the main archive table, there are a number of smaller tables inside the database, one for each observation type, which hold daily summaries of the type, such as the minimum and maximum value seen during the day, and at what time. These tables have names such as archive_day_outTemp or archive_day_barometer. Their existence is generally transparent to the user. For more details, see the section Daily summaries in the document Developer's Notes.
Binding names
While most users will only need the one weather database that comes with WeeWX, the reporting engine allows you to use multiple databases in the same report. For example, if you have installed the cmon computer monitoring package, which uses its own database, you may want to include some statistics or graphs about your server in your reports, using that database.
An additional complication is that WeeWX can use more than one database implementation: SQLite or MySQL. Making users specify in the templates not only which database to use, but also which implementation, would be unreasonable.
The solution, like so many other problems in computer science, is to introduce another level of indirection, a database binding. Rather than specify which database to use, you specify which binding to use. Bindings do not change with the database implementation, so, for example, you know that wx_binding will always point to the weather database, no matter if its implementation is a sqlite database or a MySQL database. Bindings are listed in section [DataBindings] in weewx.conf.
The standard weather database binding that WeeWX uses is wx_binding. This is the binding that you will be using most of the time and, indeed, it is the default. You rarely have to specify it explicitly.
Programming interface
WeeWX includes a module called weedb that provides a single interface for many of the differences between database implementations such as SQLite and MySQL. However, it is not uncommon to make direct SQL queries within services or search list extensions. In such cases, the SQL should be generic so that it will work with every type of database.
The database manager class provides methods to create, open, and query a database. These are the canonical forms for obtaining a database manager.
If you are opening a database from within a WeeWX service:
db_manager = self.engine.db_binder.get_manager(data_binding='name_of_binding', initialize=True)

# Sample query:
db_manager.getSql("SELECT SUM(rain) FROM %s "\
    "WHERE dateTime>? AND dateTime<=?" % db_manager.table_name, (start_ts, stop_ts))
If you are opening a database from within a WeeWX search list extension, you will be passed in a function db_lookup() as a parameter, which can be used to bind to a database. By default, it returns a manager bound to wx_binding:
wx_manager    = db_lookup()                                    # Get default binding
other_manager = db_lookup(data_binding='some_other_binding')   # Get an explicit binding

# Sample queries:
wx_manager.getSql("SELECT SUM(rain) FROM %s "\
    "WHERE dateTime>? AND dateTime<=?" % wx_manager.table_name, (start_ts, stop_ts))
other_manager.getSql("SELECT SUM(power) FROM %s"\
    "WHERE dateTime>? AND dateTime<=?" % other_manager.table_name, (start_ts, stop_ts))
If opening a database from somewhere other than a service, and there is no DBBinder available:
db_manager = weewx.manager.open_manager_with_config(config_dict, data_binding='name_of_binding')

# Sample query:
db_manager.getSql("SELECT SUM(rain) FROM %s "\
    "WHERE dateTime>? AND dateTime<=?" % db_manager.table_name, (start_ts, stop_ts))
The DBBinder caches managers, and thus database connections. It cannot be shared between threads.
Units
The unit architecture in WeeWX is designed to make basic unit conversions and display of units easy. It is not designed to provide dimensional analysis, arbitrary conversions, and indications of compatibility.
The driver reads observations from an instrument and converts them, as necessary, into a standard set of units. The actual units used by each instrument vary widely; some instruments use Metric units, others use US Customary units, and many use a mixture. The driver ensures that the units are consistent for storage in the WeeWX database. By default, and to maintain compatibility with wview, the default database units are US Customary, although this can be changed.
Note that whatever unit system is used in the database, data can be displayed using any unit system. So, in practice, it does not matter what unit system is used in the database.
Each observation type, such as outTemp or pressure, is associated with a unit group, such as group_temperature or group_pressure. Each unit group is associated with a unit type such as degree_F or mbar. The reporting service uses this architecture to convert observations into a target unit system, to be displayed in your reports.
With this architecture one can easily create reports with, say, wind measured in knots, rain measured in mm, and temperatures in degree Celsius. Or one can create a single set of templates, but display data in different unit systems with only a few stanzas in a configuration file.
Customizing reports
There are two general mechanisms for customizing reports: change options in one or more configuration files, or change the template files. The former is generally easier, but occasionally the latter is necessary.
Options
Options are used to specify how reports will look and what they will contain. For example, they control which units to use, how to format dates and times, which data should be in each plot, the colors of plot elements, etc.
For a complete listing of the report options, see the section Reference: report options.
Options are read from three different types of configuration files:
| File | Use |
| weewx.conf | This is the application configuration file. It contains general configuration information, such which drivers and services to load, as well as which reports to run. Report options can also be specified in this file. |
| skin.conf | This is the skin configuration file. It contains information specific to a skin, in particular, which template files to process, and which plots to generate. Typically this file is supplied by the skin author. |
| en.conf de.conf fr.conf etc. |
These are internationalization files. They contain language and locale information for a specific skin. |
Configuration files are read and processed using the Python utility ConfigObj, using a format similar to the MS-DOS "INI" format. Here's a simple example:
[Section1]
    # A comment
    key1 = value1
    [[SubSectionA]]
        key2 = value2
[Section2]
    key3=value3
This example uses two sections at root level (sections Section1 and Section2), and one sub-section (SubSectionA), which is nested under Section1. The option key1 is nested under Section1, option key3 is nested under Section2, while option key2 is nested under sub-section SubSectionA.
Note that while this example indents sub-sections and options, this is strictly for readability — this isn't Python! It's the number of brackets that counts in determining nesting, not the indentation!
Configuration files take advantage of ConfigObj's ability to organize options hierarchically into stanzas. For example, the [Labels] stanza contains the text that should be displayed for each observation. The [Units] stanza contains other stanzas, each of which contains parameters that control the display of units.
Processing order
Configuration files and their sections are processed in a specific order. Generally, the values from the skin configuration file (skin.conf) are processed first, then options in the WeeWX configuration file (nominally weewx.conf) are applied last. This order allows skin authors to specify the basic look and feel of a report, while ensuring that users of the skin have the final say.
To illustrate the processing order, here are the steps for the skin Seasons:
- First, a set of options defined in the Python module weewx.defaults serve as the starting point.
- Next, options from the configuration file for Seasons, located in skins/Seasons/skin.conf, are merged.
- Next, any options that apply to all skins, specified in the [StdReport] / [[Defaults]] section of the WeeWX configuration file, are merged.
- Finally, any skin-specific options, specified in the [StdReport] / [[Seasons]] section of the WeeWX configuration, are merged. These options have the final say.
At all four steps, if a language specification is encountered (option lang), then the corresponding language file will be read and merged. If a unit specification (option unit_system) is encountered, then the appropriate unit groups are set. For example, if unit_system=metricwx, then the unit for group pressure will be set to mbar, etc.
The result is the following option hierarchy, listed in order of increasing precedence.
| File | Example | Comments |
| weewx/defaults.py |
[Units] [[Labels]] mbar=" mbar" |
These are the hard-coded default values for every option. They are used when an option is not specified anywhere else. These should not be modified unless you propose a change to the WeeWX code; any changes made here will be lost when the software is updated. |
| skin.conf |
[Units] [[Labels]] mbar=" hPa" |
Supplied by the skin author, the skin configuration file, skin.conf, contains options that define the baseline behavior of the skin. In this example, for whatever reasons, the skin author has decided that the label for units in millibars should be " hPa" (which is equivalent). |
| weewx.conf |
[StdReport] [[Defaults]] [[[Labels]]] [[[[Generic]]]] rain=Rainfall |
Options specified under [[Defaults]] apply to all reports. This example indicates that the label Rainfall should be used for the observation rain, in all reports. |
| weewx.conf |
[StdReport] [[SeasonsReport]] [[[Labels]]] [[[[Generic]]]] inTemp=Kitchen temperature |
Highest precedence. Has the final say. Options specified here apply to a single report. This example indicates that the label Kitchen temperature should be used for the observation inTemp, but only for the report SeasonsReport. |
Note: When specifying options, you must pay attention to the number of brackets! In the table above, there are two different nesting depths used: one for weewx.conf, and one for weewx/defaults.py and skin.conf. This is because the stanzas defined in weewx.conf start two levels down in the hierarchy [StdReport], whereas the stanzas defined in skin.conf and defaults.py are at the root level. Therefore, options specified in weewx.conf must use two extra sets of brackets.
Other skins are processed in a similar manner although, of course, their name will be something other than Seasons.
Although it is possible to modify the options at any level, as the user of a skin, it is usually best to keep your modifications in the WeeWX configuration file (weewx.conf) if you can. That way you can apply any fixes or changes when the skin author updates the skin, and your customizations will not be overwritten.
If you are a skin author, then you should provide the skin configuration file (skin.conf), and put in it only the options necessary to make the skin render the way you intend it. Any options that are likely to be localized for a specific language (in particular, text), should be put in the appropriate language file.
Changing languages
By default, the skins that come with WeeWX are set up for the English language, but suppose you wish to switch to another language. How you do so will depend on whether the skin you are using has been internationalized and, if so, whether it offers your local language.
Internationalized skins
All of the skins included with WeeWX have been internationalized, so if you're working with one of them, this is the section you want. Next, you need to check whether there is a localization file for your particular language. To check, look in the contents of subdirectory lang in the skin's directory. For example, if you used a package installer and are using the Seasons skin, you will want to look in /etc/weewx/skins/Seasons/lang. Inside, you will see something like this:
ls -l /etc/weewx/skins/Seasons/lang
total 136
-rw-rw-r-- 1 tkeffer tkeffer  9447 Jul  1 11:11 cn.conf
-rw-rw-r-- 1 tkeffer tkeffer  9844 Mar 13 12:31 cz.conf
-rw-rw-r-- 1 tkeffer tkeffer  9745 Mar 13 12:31 de.conf
-rw-rw-r-- 1 tkeffer tkeffer  9459 Mar 13 12:31 en.conf
-rw-rw-r-- 1 tkeffer tkeffer 10702 Mar 13 12:31 es.conf
-rw-rw-r-- 1 tkeffer tkeffer 10673 May 31 07:50 fr.conf
-rw-rw-r-- 1 tkeffer tkeffer 11838 Mar 13 12:31 gr.conf
-rw-rw-r-- 1 tkeffer tkeffer  9947 Mar 13 12:31 it.conf
-rw-rw-r-- 1 tkeffer tkeffer  9548 Mar 13 12:31 nl.conf
-rw-rw-r-- 1 tkeffer tkeffer 10722 Apr 15 14:52 no.conf
-rw-rw-r-- 1 tkeffer tkeffer 15356 Mar 13 12:31 th.conf
This means that the Seasons skin has been localized for the following languages:
| File | Language |
| cn.conf | Traditional Chinese |
| cz.conf | Czeck |
| de.conf | German |
| en.conf | English |
| es.conf | Spanish |
| fr.conf | French |
| it.conf | Italian |
| gr.conf | Greek |
| nl.conf | Dutch |
| th.conf | Thai |
If you want to use the Seasons skin and are working with one of these languages, then you are in luck: you can simply override the lang option. For example, to change the language displayed by the Seasons skin from English to German, edit weewx.conf, and change the highlighted section:
[StdReport]
    ...
    [[SeasonsReport]]
        # The SeasonsReport uses the 'Seasons' skin, which contains the
        # images, templates and plots for the report.
        skin = Seasons
        enable = true
        lang = de
By contrast, if the skin has been internationalized, but there is no localization file for your language, then you will have to supply one. See the section Internationalized, but your language is missing.
Changing date and time formats
Date and time formats are specified using the same format strings used by strftime(). For example, %Y indicates the 4-digit year, and %H:%M indicates the time in hours:minutes. The default values for date and time formats are generally %x %X, which indicates "use the format for the locale of the computer".
Since date formats default to the locale of the computer, a date might appear with the format of "month/day/year". What if you prefer dates to have the format "year.month.day"? How do you indicate 24-hour time format versus 12-hour?
Dates and times generally appear in two places: in plots and in tags.
Date and time formats in images
Most plots have a label on the horizontal axis that indicates when the plot was generated. By default, the format for this label uses the locale of the computer on which WeeWX is running, but you can modify the format by specifying the option bottom_label_format.
For example, this would result in a date/time string such as "2021.12.13 12:45" no matter what the computer's locale:
[StdReport]
    ...
    [[Defaults]]
        [[[ImageGenerator]]]
            [[[[day_images]]]]
                bottom_label_format = %Y.%m.%d %H:%M
            [[[[week_images]]]]
                bottom_label_format = %Y.%m.%d %H:%M
            [[[[month_images]]]]
                bottom_label_format = %Y.%m.%d %H:%M
            [[[[year_images]]]]
                bottom_label_format = %Y.%m.%d %H:%M
Date and time formats for tags
Each aggregation period has a format for the times associated with that period. These formats are defined in the TimeFormats section. The default format for each uses the date and/or time for the computer of the locale on which WeeWX is running.
For example, this would result in a date/time string such as "2021.12.13 12:45" no matter what the computer's locale:
[StdReport]
    ...
    [[Defaults]]
        [[[Units]]]
            [[[[TimeFormats]]]]
                hour        = %H:%M
                day         = %Y.%m.%d
                week        = %Y.%m.%d (%A)
                month       = %Y.%m.%d %H:%M
                year        = %Y.%m.%d %H:%M
                rainyear    = %Y.%m.%d %H:%M
                current     = %Y.%m.%d %H:%M
                ephem_day   = %H:%M
                ephem_year  = %Y.%m.%d %H:%M
Changing unit systems
Each unit system is a set of units. For example, the METRIC unit system uses centimeters for rain, kilometers per hour for wind speed, and degree Celsius for temperature. The option unit_system controls which unit system will be used in your reports. The available choices are US, METRIC, or METRICWX. The option is case-insensitive. See the Appendix Units for the unit defined in each of these unit systems.
By default, WeeWX uses US (US Customary) system. Suppose you would rather use the METRICWX system for all your reports? Then change this
[StdReport]
    ...
    [[Defaults]]

        # Which unit system to use for all reports. Choices are 'us', 'metric', or 'metricwx'.
        # You can override this for individual reports.
        unit_system = us
to this
[StdReport]
    ...
    [[Defaults]]

        # Which unit system to use for all reports. Choices are 'us', 'metric', or 'metricwx'.
        # You can override this for individual reports.
        unit_system = metricwx
Mixed units
However, what if you want a mix? For example, suppose you generally want US Customary units, but you want barometric pressures to be in millibars? This can be done by overriding the appropriate unit group.
[StdReport]
    ...
    [[Defaults]]

        # Which unit system to use for all reports. Choices are 'us', 'metric', or 'metricwx'.
        # You can override this for individual reports.
        unit_system = us

        # Override the units used for pressure:
        [[[Units]]]
            [[[[Groups]]]]
                group_pressure = mbar
This says that you generally want the US systems of units for all reports, but want pressure to be reported in millibars. Other units can be overridden in a similar manner.
Multiple unit systems
Another example. Suppose we want to generate two reports, one in the US Customary system, the other using the METRICWX system. The first, call it SeasonsUSReport, will go in the regular directory HTML_ROOT. However, the latter, call it SeasonsMetricReport, will go in a subdirectory, HTML_ROOT/metric. Here's how you would do it
[StdReport]

    # Where the skins reside, relative to WEEWX_ROOT
    SKIN_ROOT = skins

    # Where the generated reports should go, relative to WEEWX_ROOT
    HTML_ROOT = public_html

    # The database binding indicates which data should be used in reports.
    data_binding = wx_binding

    [[SeasonsUSReport]]
        skin = Seasons
        unit_system = us
        enable = true

    [[SeasonsMetricReport]]
        skin = Seasons
        unit_system = metricwx
        HTML_ROOT = public_html/metric
        enable = true
Note how both reports use the same skin (that is, skin Seasons), but different unit systems, and different destinations. The first, SeasonsUSReport sets option unit_system to us, and uses the default destination. By contrast, the second, SeasonsMetricReport, uses unit system metricwx, and a different destination, public_html/metric.
Changing labels
Every observation type is associated with a default label. For example, in the English language, the default label for observation type outTemp is generally Outside Temperature. You can change this label by overriding the default. How you do so will depend on whether the skin you are using has been internationalized and, if so, whether it offers your local language.
Let's look at an example. If you take a look inside the file skins/Seasons/lang/en.conf, you will see it contains what looks like a big configuration file. Among other things, it has two entries that look like this:
...
[Labels]
    ...
    [[Generic]]
        ...
        inTemp = Inside Temperature
        outTemp = Outside Temperature
        ...
This tells the report generators that when it comes time to label the observation variables inTemp and outTemp, use the strings Inside Temperature and Outside Temperature, respectively.
However, let's say that we have actually located our outside temperature sensor in the barn, and wish to label it accordingly. We need to override the label that comes in the localization file. We could just change the localization file en.conf, but then if the author of the skin came out with a new version, our change could get lost. Better to override the default by making the change in weewx.conf. To do this, make the following changes in weewx.conf:
    [[SeasonsReport]]
        # The SeasonsReport uses the 'Seasons' skin, which contains the
        # images, templates and plots for the report.
        skin = Seasons
        lang = en
        unit_system = US
        enable = true
        [[[Labels]]]
            [[[[Generic]]]]
                outTemp = Barn Temperature
This will cause the default label Outside Temperature to be replaced with the new label Barn Temperature everywhere in your report. The label for type inTemp will be untouched.
Scheduling report generation
Normal WeeWX operation is to run each report defined in weewx.conf every archive period. While this may suit most situations, there may be occasions when it is desirable to run a report less frequently than every archive period. For example, the archive interval might be 5 minutes, but you only want to FTP files every 30 minutes, once per day, or at a set time each day. WeeWX has two mechanisms that provide the ability to control when files are generated. The stale_age option allows control over the age of a file before it is regenerated, and the report_timing option allows precise control over when individual reports are run.
Note
While report_timing specifies when a given report
should be generated, the generation of reports is still controlled by the WeeWX report cycle, so reports can
never be generated more frequently than once every archive period.
The report_timing option
The report_timing option uses a CRON-like format to control when a report is to be run. While a CRON-like format is used, the control of WeeWX report generation using the report_timing option is confined completely to WeeWX and has no interraction with the system CRON service.
The report_timing option consists of five parameters separated by white-space:
report_timing = minutes hours day_of_month months day_of_week
The report_timing parameters are summarised in the following table:
| Parameter | Function | Allowable values |
| minutes | Specifies the minutes of the hour when the report will be run | *, or numbers in the range 0..59 inclusive |
| hours | Specifies the hours of the day when the report will be run | *, or numbers in the range 0..23 inclusive |
| day_of_month | Specifies the days of the month when the report will be run | *, or numbers in the range 1..31 inclusive |
| months | Specifies the months of the year when the report will be run | *, or numbers in the range 1..12 inclusive, or abbreviated names in the range jan..dec inclusive |
| day_of_week | Specifies the days of the week when the report will be run | *, or numbers in the range 0..7 inclusive (0,7 = Sunday, 1 = Monday etc), or abbreviated names in the range sun..sat inclusive |
The report_timing option may only be used in weewx.conf. When set in the [StdReport] section of weewx.conf the option will apply to all reports listed under [StdReport]. When specified within a report section, the option will override any setting in [StdReport] for that report. In this manner it is possible to have different reports run at different times. The following sample weewx.conf excerpt illustrates this:
[StdReport]

    # Where the skins reside, relative to WEEWX_ROOT
    SKIN_ROOT = skins

    # Where the generated reports should go, relative to WEEWX_ROOT
    HTML_ROOT = public_html

    # The database binding indicates which data should be used in reports.
    data_binding = wx_binding

    # Report timing parameter
    report_timing = 0 * * * *

    # Each of the following subsections defines a report that will be run.

    [[AReport]]
        skin = SomeSkin

    [[AnotherReport]]
        skin = SomeOtherSkin
        report_timing = */10 * * * *
In this case, the [[AReport]] report would be run under under control of the 0 * * * * setting (on the hour) under [StdReport] and the [[AnotherReport]] report would be run under control of the */10 * * * * setting (every 10 minutes) which has overriden the [StdReport] setting.
How report_timing controls reporting
The syntax and interpretation of the report_timing parameters are largely the same as those of the CRON service in many Unix and Unix-like operating systems. The syntax and interpretation are outlined below.
When the report_timing option is in use WeeWX will run a report when the minute, hour and month of year parameters match the report time, and at least one of the two day parameters (day of month or day of week) match the report time. This means that non-existent times, such as "missing hours" during daylight savings changeover, will never match, causing reports scheduled during the "missing times" not to be run. Similarly, times that occur more than once (again, during daylight savings changeover) will cause matching reports to be run more than once.
Note
Report time does not refer to the time at which the report is run, but rather the
date and time of the latest data the report is based upon. If you like, it is the effective date and time of
the report. For normal WeeWX operation, the report time aligns with the dateTime
of the most recent archive record. When reports are run using the wee_reports
utility, the report time is either the dateTime of the most recent archive record
(the default) or the optional timestamp command line argument.
Note
The day a report is to be run can be specified by two parameters; day of month
and/or day of week. If both parameters are restricted (i.e., not an asterisk), the report will be run when
either field matches the current time. For example,
report_timing = 30 4
1,15 * 5
would cause the report to be run at 4:30am on the 1st and 15th of each month as well as
4:30am every Friday.
The relationship between report_timing and archive period
A traditional CRON service has a resolution of one minute, meaning that the CRON service checks each minute as to whether to execute any commands. On the other hand, the WeeWX report system checks which reports are to be run once per archive period, where the archive period may be one minute, five minutes, or some other user defined period. Consequently, the report_timing option may specify a report to be run at some time that does not align with the WeeWX archive period. In such cases the report_timing option does not cause a report to be run outside of the normal WeeWX report cycle, rather it will cause the report to be run during the next report cycle. At the start of each report cycle, and provided a report_timing option is set, WeeWX will check each minute boundary from the current report time back until the report time of the previous report cycle. If a match is found on any of these one minute boundaries the report will be run during the report cycle. This may be best described through some examples:
| report_timing | Archive period | When the report will be run |
| 0 * * * * | 5 minutes | The report will be run only during the report cycle commencing on the hour. |
| 5 * * * * | 5 minutes | The report will be run only during the report cycle commencing at 5 minutes past the hour. |
| 3 * * * * | 5 minutes | The report will be run only during the report cycle commencing at 5 minutes past the hour. |
| 10 * * * * | 15 minutes | The report will be run only during the report cycle commencing at 15 minutes past the hour |
| 10,40 * * * * | 15 minutes | The report will be run only during the report cycles commencing at 15 minutes past the hour and 45 minutes past the hour. |
| 5,10 * * * * | 15 minutes | The report will be run once only during the report cycle commencing at 15 minutes past the hour. |
Lists, ranges and steps
The report_timing option supports lists, ranges, and steps for all parameters. Lists, ranges, and steps may be used as follows:
- Lists. A list is a set of numbers (or ranges) separated by commas, for example 1, 2, 5, 9 or 0-4, 8-12. A match with any of the elements of the list will result in a match for that particular parameter. If the examples were applied to the minutes parameter, and subject to other parameters in the report_timing option, the report would be run at minutes 1, 2, 5, and 9 and 0, 1, 2, 3, 4, 8, 9, 10, 11, and 12 respectively. Abbreviated month and day names cannot be used in a list.
- Ranges. Ranges are two numbers separated with a hyphen, for example 8-11. The specified range is inclusive. A match with any of the values included in the range will result in a match for that particular parameter. If the example was applied to the hours parameter, and subject to other parameters in the report_timing option, the report would be run at hours 8, 9, 10, and 11. A range may be included as an element of a list. Abbreviated month and day names cannot be used in a range.
- Steps. A step can be used in conjunction with a range or asterisk and are denoted by a '/' followed by a number. Following a range with a step specifies skips of the step number's value through the range. For example, 0-12/2 used in the hours parameter would, subject to other parameter in the report_timing option, run the report at hours 0, 2, 4, 6, 8, and 12. Steps are also permitted after an asterisk in which case the skips of the step number's value occur through the all possible values of the parameter. For example, */3 can be used in the hours parameter to, subject to other parameter in the report_timing option, run the report at hours 0, 3, 6, 9, 12, 15, 18, and 21.
Nicknames
The report_timing option supports a number of time specification 'nicknames'. These nicknames are prefixed by the '@' character and replace the five parameters in the report_timing option. The nicknames supported are:
| Nickname | Equivalent setting | When the report will be run |
| @yearly @annually |
0 0 1 1 * | Once per year at midnight on 1 January. |
| @monthly | 0 0 1 * * | Monthly at midnight on the 1st of the month. |
| @weekly | 0 0 * * 0 | Every week at midnight on Sunday. |
| @daily | 0 0 * * * | Every day at midnight. |
| @hourly | 0 * * * * | Every hour on the hour. |
Examples of report_timing
Numeric settings for report_timing can be at times difficult to understand due to the complex combinations of parameters. The following table shows a number of example report_timing options and the corresponding times when the report would be run.
| report_timing | When the report will be run |
| * * * * * | Every archive period. This setting is effectively the default WeeWX method of operation. |
| 25 * * * * | 25 minutes past every hour. |
| 0 * * * * | Every hour on the hour. |
| 5 0 * * * | 00:05 daily. |
| 25 16 * * * | 16:25 daily. |
| 25 16 1 * * | 16:25 on the 1st of each month. |
| 25 16 1 2 * | 16:25 on the 1st of February. |
| 25 16 * * 0 | 16:25 each Sunday. |
| */10 * * * * | On the hour and 10, 20, 30, 40 and 50 mnutes past the hour. |
| */9 * * * * | On the hour and 9, 18, 27, 36, 45 and 54 minutes past the hour. |
| */10 */2 * * * | 0, 10, 20, 30, 40 and 50 minutes after the even hour. |
| * 6-17 * * * | Every archive period from 06:00 (inclusive) up until, but excluding, 18:00. |
| * 1,4,14 * * * | Every archive period in the hour starting 01:00 to 01:59, 04:00 to 04:59 amd 14:00 to 14:59 (Note excludes report times at 02:00, 05:00 and 15:00). |
| 0 * 1 * 0,3 | On the hour on the first of the month and on the hour every Sunday and Wednesday. |
| * * 21,1-10/3 6 * | Every archive period on the 1st, 4th, 7th, 10th and 21st of June. |
| @monthly | Midnight on the 1st of the month. |
The wee_reports utility and the report_timing option
The report_timing option is ignored when using the wee_reports utility.
The Cheetah generator
This section gives an overview of the Cheetah generator. For details about each of its various options, see the section [CheetahGenerator] in the Reference: report options.
File generation is done using the Cheetah templating engine, which processes a template, replacing any symbolic tags, then produces an output file. Typically, it runs after each new archive record (usually about every five minutes), but it can also run on demand using the wee_reports utility.
The Cheetah engine is very powerful, essentially letting you have the full semantics of Python available in your templates. As this would make the templates incomprehensible to anyone but a Python programmer, WeeWX adopts a very small subset of its power.
The Cheetah generator is controlled by the section [CheetahGenerator]. Let's take a look at how this works.
Which files get processed?
Each template file is named something like D/F.E.tmpl, where D is the (optional) directory the template sits in and will also be the directory the results will be put in, and F.E is the generated file name. So, given a template file with name Acme/index.html.tmpl, the results will be put in HTML_ROOT/Acme/index.html.
The configuration for a group of templates will look something like this:
[CheetahGenerator]
    [[index]]
        template = index.html.tmpl
    [[textfile]]
        template = filename.txt.tmpl
    [[xmlfile]]
        template = filename.xml.tmpl
There can be only one template in each block. In most cases, the block name does not matter — it is used only to isolate each template. However, there are four block names that have special meaning: SummaryByDay, SummaryByMonth, SummaryByYear, and ToDate.
Specifying template files
By way of example, here is the [CheetahGenerator] section from the skin.conf for the skin Seasons.
[CheetahGenerator]
    # The CheetahGenerator creates files from templates.  This section
    # specifies which files will be generated from which template.

    # Possible encodings include 'html_entities', 'strict_ascii', 'normalized_ascii',
    # as well as those listed in https://docs.python.org/3/library/codecs.html#standard-encodings
    encoding = html_entities

    [[SummaryByMonth]]
        # Reports that summarize "by month"
        [[[NOAA_month]]]
            encoding = normalized_ascii
            template = NOAA/NOAA-%Y-%m.txt.tmpl

    [[SummaryByYear]]
        # Reports that summarize "by year"
        [[[NOAA_year]]]
            encoding = normalized_ascii
            template = NOAA/NOAA-%Y.txt.tmpl

    [[ToDate]]
        # Reports that show statistics "to date", such as day-to-date,
        # week-to-date, month-to-date, etc.
        [[[index]]]
            template = index.html.tmpl
        [[[statistics]]]
            template = statistics.html.tmpl
        [[[telemetry]]]
            template = telemetry.html.tmpl
        [[[tabular]]]
            template = tabular.html.tmpl
        [[[celestial]]]
            template = celestial.html.tmpl
            # Uncomment the following to have WeeWX generate a celestial page only once an hour:
            # stale_age = 3600
        [[[RSS]]]
            template = rss.xml.tmpl
The skin contains three different kinds of generated output:
- Summary by Month. The skin uses SummaryByMonth to produce NOAA summaries, one for each month, as a simple text file.
- Summary by Year. The skin uses SummaryByYear to produce NOAA summaries, one for each year, as a simple text file.
- Summary "To Date". The skin produces an HTML index.html page, as well as HTML files for detailed statistics, telemetry, and celestial information. It also includes a master page (tabular.html) in which NOAA information is displayed. All these files are HTML.
Because the option
encoding = html_entities
appears directly under [StdReport], this will be the default encoding of the generated files unless explicitly overridden. We see an example of this under [SummaryByMonth] and [SummaryByYear], which use option normalized_ascii instead (replaces accented characters with a non-accented analog).
Other than SummaryByMonth and SummaryByYear, the section names are arbitrary. ToDate could just as well have been called files_to_date, and the sections index, statistics, and telemetry could just as well have been called tom, dick, and harry.
[[SummaryByYear]]
Use SummaryByYear to generate a set of files, one file per year. The name of the template file should contain a strftime() code for the year; this will be replaced with the year of the data in the file.
[CheetahGenerator]
    [[SummaryByYear]]
        # Reports that summarize "by year"
        [[[NOAA_year]]]
            encoding = normalized_ascii
            template = NOAA/NOAA-%Y.txt.tmpl
The template NOAA/NOAA-%Y.txt.tmpl might look something like this:
           SUMMARY FOR YEAR $year.dateTime

MONTHLY TEMPERATURES AND HUMIDITIES:
#for $record in $year.records
$record.dateTime $record.outTemp $record.outHumidity
#end for
[[SummaryByMonth]]
Use SummaryByMonth to generate a set of files, one file per month. The name of the template file should contain a strftime() code for year and month; these will be replaced with the year and month of the data in the file.
[CheetahGenerator]
    [[SummaryByMonth]]
        # Reports that summarize "by month"
        [[[NOAA_month]]]
            encoding = normalized_ascii
            template = NOAA/NOAA-%Y-%m.txt.tmpl
The template NOAA/NOAA-%Y-%m.txt.tmpl might look something like this:
           SUMMARY FOR MONTH $month.dateTime

DAILY TEMPERATURES AND HUMIDITIES:
#for $record in $month.records
$record.dateTime $record.outTemp $record.outHumidity
#end for
[[SummaryByDay]]
While the Seasons skin does not make use of it, there is also a SummaryByDay capability. As the name suggests, this results in one file per day. The name of the template file should contain a strftime() code for the year, month and day; these will be replaced with the year, month, and day of the data in the file.
[CheetahGenerator]
    [[SummaryByDay]]
        # Reports that summarize "by day"
        [[[NOAA_day]]]
            encoding = normalized_ascii
            template = NOAA/NOAA-%Y-%m-%d.txt.tmpl
The template NOAA/NOAA-%Y-%m-%d.txt.tmpl might look something like this:
           SUMMARY FOR DAY $day.dateTime

HOURLY TEMPERATURES AND HUMIDITIES:
#for $record in $day.records
$record.dateTime $record.outTemp $record.outHumidity
#end for
Note
This can create a lot of files — one per day. If you have 3 years
of records, this would be more than 1,000 files!
Tags
If you look inside a template, you will see it makes heavy use of tags. As the Cheetah generator processes the template, it replaces each tag with an appropriate value and, sometimes, a label. This section discusses the details of how that happens.
If there is a tag error during template generation, the error will show up in the log file. Many errors are obvious — Cheetah will display a line number and list the template file in which the error occurred. Unfortunately, in other cases, the error message can be very cryptic and not very useful. So make small changes and test often. Use the utility wee_reports to speed up the process.
Here are some examples of tags:
$current.outTemp
$month.outTemp.max
$month.outTemp.maxtime
These code the current outside temperature, the maximum outside temperature for the month, and the time that maximum occurred, respectively. So a template file that contains:
<html>
    <head>
        <title>Current conditions</title>
    </head>
    <body>
        <p>Current temperature = $current.outTemp</p>
        <p>Max for the month is $month.outTemp.max, which occurred at $month.outTemp.maxtime</p>
    </body>
</html>
would be all you need for a very simple HTML page that would display the text (assuming that the unit group for temperature is degree_F):
Current temperature = 51.0°F
Max for the month is 68.8°F, which occurred at 07-Oct-2009 15:15
The format that was used to format the temperature (51.0) is specified in section [Units][[StringFormat]]. The unit label °F is from section [Units][[Labels]], while the time format is from [Units][[TimeFormats]].
As we saw above, the tags can be very simple:
## Output max outside temperature using an appropriate format and label:
$month.outTemp.max
Most of the time, tags will "do the right thing" and are all you will need. However, WeeWX offers extensive customization of the generated output for specialized applications such as XML RSS feeds, or rigidly formatted reports (such as the NOAA reports). This section specifies the various tag options available.
There are two different versions of the tags, depending on whether the data is "current", or an aggregation over time. However, both versions are similar.
Time period $current
Time period $current represents a current observation. An example would be the current barometric pressure:
$current.barometer
Formally, WeeWX first looks for the observation type in the record emitted by the NEW_ARCHIVE_RECORD event. This is generally the data emitted by the station console, augmented by any derived variables (e.g. wind chill) that you might have specified. If the observation type cannot be found there, the most recent record in the database will be searched.
The most general tag for a "current" observation looks like:
$current($timestamp=some_time, $max_delta=delta_t,$data_binding=binding_name).obstype[.optional_unit_conversion][.optional_rounding][.optional_formatting]
Where:
some_time is a timestamp that you want to display. It is optional, The default is to display the value for the current time.
delta_t is the largest time difference (in seconds) between the time specified and a timestamp of a record in the database that will be returned. By default, it is zero, which means there must be an exact match with a specified time for a record to be retrieved.
binding_name is a binding name to a database. An example would be wx_binding. See the section Binding names for more details.
obstype is an observation type, such as barometer. This type must appear either as a field in the database, or in the current (usually, the latest) record.
optional_unit_conversion is an optional unit conversion tag. If provided, the results will be converted into the specified units, otherwise the default units specified in the skin configuration file (in section [Units][[Groups]]) will be used. See the section Unit conversion options.
optional_rounding allows the results to be rounded to a fixed number of decimal digits. See the section Optional rounding
optional_formatting is a set of optional formatting tags, which control how the value will appear. See the section Formatting options below.
Time period $latest
Time period $latest is very similar to $current, except that it uses the last available timestamp in a database. Usually, $current and $latest are the same, but if a data binding points to a remote database, they may not be. See the section Using multiple bindings for an example where this happened.
Aggregation periods
Aggregation periods is the other kind of tag. For example,
$week.rain.sum
represents an aggregation over time, using a certain aggregation type. In this example, the aggregation time is a week, and the aggregation type is summation. So, this tag represents the total rainfall over a week.
The most general tag for an aggregation over time looks like:
$period($data_binding=binding_name, $optional_ago=delta).statstype.aggregation[.optional_unit_conversion][.optional_rounding][.optional_formatting]
Where:
period is the time period over which the aggregation is to be done. Possible choices are listed in the table below.
binding_name is a binding name to a database. An example would be wx_binding. See the section Binding names for more details.
optional_ago is a keyword that depends on the aggregation period. For example, for week, it would be weeks_ago, for day, it would be days_ago, etc.
delta is an integer indicating which aggregation period is desired. For example $week($weeks_ago=1) indicates last week, $day($days_ago=2) would be the day-before-yesterday, etc. The default is zero: that is, this aggregation period.
statstype is a statistical type. This is generally any observation type that appears in the database, as well as a few synthetic types (such as heating and cooling degree-days). Not all aggregations are supported for all types.
aggregation is an aggregation type. If you ask for $month.outTemp.avg you are asking for the average outside temperature for the month. Possible aggregation types are given in Appendix: Aggregation types.
optional_unit_conversion is an optional unit conversion tag. If provided, the results will be converted into the specified units, otherwise the default units specified in the skin configuration file (in section [Units][[Groups]]) will be used. See the section Unit Conversion Options.
optional_rounding allows the results to be rounded to a fixed number of decimal digits. See the section Optional rounding
optional_formatting is a set of optional formatting tags, which control how the value will appear. See the section Formatting Options below.
There are several different aggregation periods that can be used:
| Aggregation period | Meaning | Example | Meaning of example |
| $hour | This hour. | $hour.outTemp.maxtime | The time of the max temperature this hour. |
| $day | Today (since midnight). | $day.outTemp.max | The max temperature since midnight |
| $yesterday | Yesterday. Synonym for $day($days_ago=1). | $yesterday.outTemp.maxtime | The time of the max temperature yesterday. |
| $week | This week. The start of the week is set by option week_start. | $week.outTemp.max | The max temperature this week. |
| $month | This month (since the first of the month). | $month.outTemp.min | The minimum temperature this month. |
| $year | This year (since 1-Jan). | $year.outTemp.max | The max temperature since the start of the year. |
| $rainyear | This rain year. The start of the rain year is set by option rain_year_start. | $rainyear.rain.sum | The total rainfall for this rain year. The start of the rain year is set by option rain_year_start. |
| $alltime | All records in the database given by binding_name. | $alltime.outTemp.max | The maximum outside temperature in the default database. |
The $optional_ago parameters can be useful for statistics farther in the past. Here are some examples:
| Aggregation period | Example | Meaning |
| $hour($hours_ago=h) | $hour($hours_ago=1).outTemp.avg | The average temperature last hour (1 hour ago). |
| $day($days_ago=d) | $day($days_ago=2).outTemp.avg | The average temperature day before yesterday (2 days ago). |
| $week($weeks_ago=d) | $week($weeks_ago=1).outTemp.max | The maximum temperature last week. |
| $month($months_ago=m) | $month($months_ago=1).outTemp.max | The maximum temperature last month. |
| $year($years_ago=m) | $year($years_ago=1).outTemp.max | The maximum temperature last year. |
Unit conversion options
The tag optional_unit_conversion can be used with either current observations or aggregations. If supplied, the results will be converted to the specified units. For example, if you have set group_pressure to inches of mercury (inHg), then the tag
Today's average pressure=$day.barometer.avg
would normally give a result such as
Today's average pressure=30.05 inHg
However, if you add mbar to the end of the tag,
Today's average pressure=$day.barometer.avg.mbar
then the results will be in millibars:
Today's average pressure=1017.5 mbar
Illegal conversions
If an inappropriate or nonsense conversion is asked for, e.g.,
Today's minimum pressure in mbars: $day.barometer.min.mbar
or in degrees C: $day.barometer.min.degree_C
or in foobar units: $day.barometer.min.foobar
then the offending tag(s) will be put in the output:
Today's minimum pressure in mbars: 1015.3
or in degrees C: $day.barometer.min.degree_C
or in
foobar units: $day.barometer.min.foobar
Optional rounding
The data in the resultant tag can be optionally rounded to a fixed number of decimal digits. This is useful when emitting raw data or JSON strings. It should not be used with formatted data (using a format string would be a better choice).
The structure of the tag is
.round(ndigits=None)
where
ndigits is the number of decimal digits to retain. If None (the default), then all digits will be retained.
Formatting options
A variety of tags and arguments are available to you to customize the formatting of the final observation value. This table lists the tags:
| Optional formatting tag | Comment |
| .format(args) | Format the value as a string, according to a set of optional args (see below). |
| .ordinal_compass | Format the value as a compass ordinals (e.g."SW"), useful for wind directions. The ordinal abbreviations are set by option directions in the skin configuration file skin.conf. |
| .long_form | Format delta times in the "long form". A "delta time" is the difference between two times. An example is the amount of uptime (difference between start and current time). By default, this will be formatted as the number of elapsed seconds (e.g., 45000 seconds). The "long form" breaks the time down into constituent time elements (e.g., 12 hours, 30 minutes, 0 seconds). |
| .json | Format the value as a JSON string. |
| .raw | Return the value "as is", without being converted to a string and without any formatting applied. This can be useful for doing arithmetic directly within the templates. You must be prepared to deal with a potential None value. |
The first of these tags (.format()) has the formal structure:
.format(format_string=None, None_string=None, add_label=True, localize=True)
Here is the meaning of each of the optional arguments:
| Optional argument | Comment |
| format_string | Use the optional string to format the value. If set to None, then an appropriate string format from skin.conf will be used. |
| None_string | Should the observation value be NONE, then use the supplied string (typically, something like "N/A"). If None_string is set to None, then the value for NONE in [Units][[StringFormats]] will be used. |
| add_label | If set to True (the default), then a unit label (e.g., °F) from skin.conf will be attached to the end. Otherwise, it will be left out. |
| localize | If set to True (the default), then localize the results. Otherwise, do not. |
If you're willing to honor the ordering of the arguments, the argument name can be omitted.
Formatting examples
This section gives a number of example tags, and their expected output. The following values are assumed:
| Observation | Value |
| outTemp | 45.2°F |
| UV | None |
| windDir | 138° |
| dateTime | 1270250700 |
Here are the examples:
| Tag | Result | Result type |
Comment |
| $current.outTemp | 45.2°F | str | String formatting from [Units][[StringFormats]]. Label from [Units][[Labels]]. |
| $current.outTemp.format | 45.2°F | str | Same as the $current.outTemp. |
| $current.outTemp.format() | 45.2°F | str | Same as the $current.outTemp. |
| $current.outTemp.format(format_string="%.3f") | 45.200°F | str | Specified string format used; label from [Units][[Labels]]. |
| $current.outTemp.format("%.3f") | 45.200°F | str | As above, except a positional argument, instead of the named argument, is being used. |
| $current.outTemp.format(add_label=False) | 45.2 | str | No label. The string formatting is from [Units][[StringFormats]]. |
| $current.UV | N/A | str | The string specified by option NONE in [Units][[StringFormats]]. |
| $current.UV.format(None_string="No UV") | No UV | str | Specified None_string is used. |
| $current.windDir | 138° | str | Formatting is from option degree_compass in [Units][[StringFormats]]. |
| $current.windDir.ordinal_compass | SW | str | Ordinal direction from section [Units][[Ordinates]] is being substituted. |
| $current.dateTime | 02-Apr-2010 16:25 | str | Time formatting from [Units][[TimeFormats]] is being used. |
| $current.dateTime.format(format_string="%H:%M") | 16:25 | str | Specified time format used. |
| $current.dateTime.format("%H:%M") | 16:25 | str | As above, except a positional argument, instead of the named argument, is being used. |
| $current.dateTime.raw | 1270250700 | int | Raw Unix epoch time. The result is an integer. |
| $current.outTemp.raw | 45.2 | float | Raw float value. The result is a float. |
| $current.outTemp.degree_C.raw | 7.33333333 | float | Raw float value in degrees Celsius. The result is a float. |
| $current.outTemp.degree_C.json | 7.33333333 | str | Value in degrees Celsius, converted to a JSON string. |
| $current.outTemp.degree_C.round(2).json | 7.33 | str | Value in degrees Celsius, rounded to two decimal digits, then converted to a JSON string. |
Note that the same formatting conventions can be used for aggregation periods, such as $month, as well as $current.
Start, end, and dateTime
While not an observation type, in many ways the time of an observation, dateTime, can be treated as one. A tag such as
$current.dateTime
represents the current time (more properly, the time as of the end of the last archive interval) and would produce something like
01/09/2010 12:30:00
Like true observation types, explicit formats can be specified, except that they require a strftime() time format , rather than a string format.
For example, adding a format descriptor like this:
$current.dateTime.format("%d-%b-%Y %H:%M")
produces
09-Jan-2010 12:30
For aggregation periods, such as $month, you can request the start, end, or length of the period, by using suffixes .start, .end, or .length, respectively. For example,
The current month runs from $month.start to $month.end and has $month.length.format("%(day)d %(day_label)s").
results in
The current month runs from 01/01/2010 12:00:00 AM to 02/01/2010 12:00:00 AM and has 31 days.
In addition to the suffixes .start and .end, the suffix .dateTime is provided for backwards compatibility. Like .start, it refers to the start of the interval.
The returned string values will always be in local time. However, if you ask for the raw value
$current.dateTime.raw
the returned value will be in Unix Epoch Time (number of seconds since 00:00:00 UTC 1 Jan 1970, i.e., a large number), which you must convert yourself. It is guaranteed to never be None, so you don't worry have to worry about handling a None value.
Tag $trend
The tag $trend is available for time trends, such as changes in barometric pressure. Here are some examples:
| Tag | Results |
| $trend.barometer | -.05 inHg |
| $trend($time_delta=3600).barometer | -.02 inHg |
| $trend.outTemp | 1.1 °C |
| $trend.time_delta | 10800 secs |
| $trend.time_delta.hour | 3 hrs |
Note how you can explicitly specify a value in the tag itself (2nd row in the table above). If you do not specify a value, then a default time interval, set by option time_delta in the skin configuration file, will be used. This value can be retrieved by using the syntax $trend.time_delta (3rd row in the table).
For example, the template expression
The barometer trend over $trend.time_delta.hour is $trend.barometer.format("%+.2f")
would result in
The barometer trend over 3 hrs is +.03 inHg.
Tag $span
The tag $span allows aggregation over a user defined period up to and including the current time. Its most general form looks like:
$span([data_binding=binding_name][,optional_delta=delta][,boundary=[None|'midnight'])
            .obstype
            .aggregation
            [.optional_unit_conversion]
            [.optional_formatting]
Where:
binding_name is a binding name to a database. An example would be wx_binding. See the section Binding names for more details.
optional_delta=delta is one or more comma separated delta settings from the table below. If more than one delta setting is included then the period used for the aggregate is the sum of the individual delta settings. If no delta setting is included, or all included delta settings are zero, the returned aggregate is based on the current obstype only.
boundary is an optional specifier that can force the starting time to a time boundary. If set to 'midnight', then the starting time will be at the previous midnight. If left out, then the start time will be the sum of the optional deltas.
obstype is a observation type, such as outTemp.
aggregation is an aggregation type. Possible aggregation types are given in Appendix: Aggregation types.
optional_unit_conversion is an optional unit conversion tag. See the section Unit conversion options.
optional_formatting is an optional formatting tag that controls how the value will appear. See the section Formatting options.
There are several different delta settings that can be used:
| Delta Setting | Example | Meaning |
| $time_delta=seconds | $span($time_delta=1800).outTemp.avg | The average temperature over the last immediate 30 minutes (1800 seconds). |
| $hour_delta=hours | $span($hour_delta=6).outTemp.avg | The average temperature over the last immediate 6 hours. |
| $day_delta=days | $span($day_delta=1).rain.sum | The total rainfall over the last immediate 24 hours. |
| $week_delta=weeks | $span($week_delta=2).barometer.max | The maximum barometric pressure over the last immediate 2 weeks. |
For example, the template expressions
The total rainfall over the last 30 hours is $span($hour_delta=30).rain.sum
and
The total rainfall over the last 30 hours is $span($hour_delta=6, $day_delta=1).rain.sum
would both result in
The total rainfall over the last 30 hours is 1.24 in
Tag $unit
The type, label, and string formats for all units are also available, allowing you to do highly customized labels:
| Tag | Results |
| $unit.unit_type.outTemp | degree_C |
| $unit.label.outTemp | °C |
| $unit.format.outTemp | %.1f |
For example, the tag
$day.outTemp.max.format(add_label=False)$unit.label.outTemp
would result in
21.2°C
(assuming metric values have been specified for group_temperature), essentially reproducing the results of the simpler tag $day.outTemp.max.
Tag $obs
The labels used for the various observation types are available using tag $obs. These are basically the values given in the skin dictionary, section [Labels][[Generic]].
| Tag | Results |
| $obs.label.outTemp | Outside Temperature |
| $obs.label.UV | UV Index |
Iteration
It is possible to iterate over the following:
| Tag suffix | Results |
| .records | Iterate over every record |
| .hours | Iterate by hours |
| .days | Iterate by days |
| .months | Iterate by months |
| .years | Iterate by years |
| .spans(interval=seconds) | Iterate by custom length spans. The default interval is 10800 seconds (3 hours). The spans will align to local time boundaries. |
The following template uses a Cheetah for loop to iterate over all months in a year, printing out each month's min and max temperature. The iteration loop is highlighted .
Min, max temperatures by month
#for $month in $year.months
$month.dateTime.format("%B"): Min, max temperatures: $month.outTemp.min $month.outTemp.max
#end for
The result is:
Min, max temperatures by month:
January: Min, max temperatures: 30.1°F 51.5°F
February: Min, max
temperatures: 24.4°F 58.6°F
March: Min, max temperatures: 27.3°F 64.1°F
April: Min, max
temperatures: 33.2°F 52.5°F
May: Min, max temperatures: N/A N/A
June: Min, max temperatures: N/A
N/A
July: Min, max temperatures: N/A N/A
August: Min, max temperatures: N/A N/A
September:
Min, max temperatures: N/A N/A
October: Min, max temperatures: N/A N/A
November: Min, max
temperatures: N/A N/A
December: Min, max temperatures: N/A N/A
The following template again uses a Cheetah for loop, this time to iterate over 3-hour spans over the last 24 hours, displaying the averages in each span. The iteration loop is highlighted .
<p>3 hour averages over the last 24 hours</p>
<table>
  <tr>
    <td>Date/time</td><td>outTemp</td><td>outHumidity</td>
  </tr>
#for $_span in $span($day_delta=1).spans(interval=10800)
  <tr>
    <td>$_span.start.format("%d/%m %H:%M")</td><td>$_span.outTemp.avg</td><td>$_span.outHumidity.avg</td>
  </tr>
#end for
</table>
The result is:
3 hour averages over the last 24 hours
| Date/time | outTemp | outHumidity |
| 21/01 18:50 | 33.4°F | 95% |
| 21/01 21:50 | 32.8°F | 96% |
| 22/01 00:50 | 33.2°F | 96% |
| 22/01 03:50 | 33.2°F | 96% |
| 22/01 06:50 | 33.8°F | 96% |
| 22/01 09:50 | 36.8°F | 95% |
| 22/01 12:50 | 39.4°F | 91% |
| 22/01 15:50 | 35.4°F | 93% |
See the NOAA template files NOAA/NOAA-YYYY.txt.tmpl and NOAA/NOAA-YYYY-MM.txt.tmpl for other examples using iteration, as well as explicit formatting.
Comprehensive example
This example is designed to put together a lot of the elements described above, including iteration, aggregation period starts and ends, formatting, and overriding units. Click here for the results.
<html>
  <head>
    <style>
      td { border: 1px solid #cccccc; padding: 5px; }
    </style>
  </head>

  <body>
    <table border=1 style="border-collapse:collapse;">
      <tr style="font-weight:bold">
        <td>Time interval</td>
        <td>Max temperature</td>
        <td>Time</td>
      </tr>
#for $hour in $day($days_ago=1).hours
      <tr>
        <td>$hour.start.format("%H:%M")-$hour.end.format("%H:%M")</td>
        <td>$hour.outTemp.max ($hour.outTemp.max.degree_C)</td>
        <td>$hour.outTemp.maxtime.format("%H:%M")</td>
      </tr>
#end for
      <caption>
        <p>
          Hourly max temperatures yesterday<br/>
          $day($days_ago=1).start.format("%d-%b-%Y")
        </p>
      </caption>
    </table>
  </body>
</html>
Helper functions
WeeWX includes a number of helper functions that may be useful when writing templates.
| Function | Description |
| $rnd(x, ndigits=None) | Round x to ndigits decimal digits. The argument x can be a float or a list of floats. Values of None are passed through. |
| $jsonize(seq) | Convert the iterable seq to a JSON string. |
| $to_int(x) | Convert x to an integer. The argument x can be of type float or str. Values of None are passed through. |
| $to_bool(x) | Convert x to a boolean. The argument x can be of type int, float, or str. If lowercase x is 'true', 'yes', or 'y' the function returns True. If it is 'false', 'no', or 'n' it returns False. Other string values raise a ValueError. In case of an numeric argument 0 means False, all other values True. |
| $to_list(x) | Convert x to a list. If x is already a list, nothing changes. If it is a single value it is converted to a list with this value as the only list element. Values of None are passed through. |
| $getobs(plot_name) |
For a given plot name, this function will return the set of all observation types used by the plot.
More information.
X
For example, consider a plot that is defined in [ImageGenerator] as [[[daytempleaf]]]
[[[[leafTemp1]]]]
[[[[leafTemp2]]]]
[[[[temperature]]]]
data_type = outTemp
The tag $getobs('daytempleaf') would return the set {'leafTemp1', 'leafTemp2', 'outTemp'}. |
Support for series
This is an experimental API that could change.
WeeWX V4.5 introduced some experimental tags for producing series of data, possibly aggregated. This can be useful for creating the JSON data needed for JavaScript plotting packages, such as HighCharts, Google Charts, or C3.js.
For example, suppose you need the maximum temperature for each day of the month. This tag
$month.outTemp.series(aggregate_type='max', aggregate_interval='day', time_series='start').json
would produce the following:
[[1614585600, 58.2], [1614672000, 55.8], [1614758400, 59.6], [1614844800, 57.8], ... ]
This is a list of (time, temperature) for each day of the month, in JSON, easily consumed by many of these plotting packages.
Many other combinations are possible. See the Wiki article Tags for series.
General tags
There are some general tags that do not reflect observation data, but technical information about the template files. They are frequently useful in #if expressions to control how Cheetah processes the template.
| Tag | Description |
| $encoding | Character encoding, to which the file is converted after creation. Possible values are html_entities, strict_ascii, normalized_ascii, and utf-8. |
| $filename |
Name of the file to be created including relative path.
Can be used to set the canonical URL for search engines.
<link rel="canonical" href="$station.station_url/$filename" /> |
| $lang | Language code set by the lang option for the report. For example, fr, or gr. |
| $month_name | For templates listed under SummaryByMonth, this will contain the localized month name (e.g., "Sep"). |
| $page | The section name from skin.conf where the template is described. |
| $skin | The value of option skin in weewx.conf. |
| $SKIN_NAME | All skin included with WeeWX, version 4.6 or later, include the tag $SKIN_NAME. For example, for the Seasons skin, $SKIN_NAME would return Seasons. |
| $SKIN_VERSION | All skin included with WeeWX, version 4.6 or later, include the tag $SKIN_VERSION, which returns the WeeWX version number of when the skin was installed. Because skins are not touched during the upgrade process, this shows the origin of the skin. |
| $SummaryByDay | A list of year-month-day strings (e.g., ["2018-12-31", "2019-01-01"]) for which a summary-by-day has been generated. The [[SummaryByDay]] section must have been processed before this tag will be valid, otherwise it will be empty. |
| $SummaryByMonth | A list of year-month strings (e.g., ["2018-12", "2019-01"]) for which a summary-by-month has been generated. The [[SummaryByMonth]] section must have been processed before this tag will be valid, otherwise it will be empty. |
| $SummaryByYear | A list of year strings (e.g., ["2018", "2019"]) for which a summary-by-year has been generated. The [[SummaryByYear]] section must have been processed before this tag will be valid, otherwise it will be empty. |
| $year_name | For templates listed under SummaryByMonth or SummaryByYear, this will contain the year (e.g., "2018"). |
Internationalization support with $gettext
Pages generated by WeeWX not only contain observation data, but also static text. The WeeWX $gettext tag provides internationalization support for these kinds of texts. It is structured very similarly to the GNU gettext facility, but its implementation is very different. To support internationalization of your template, do not use static text in your templates, but rather use $gettext. Here's how.
Suppose you write a skin called "YourSkin", and you want to include a headline labelled "Current Conditions" in English, "aktuelle Werte" in German, "Conditions actuelles" in French, etc. Then the template file could contain:
...

<h1>$gettext("Current Conditions")</h1>

...
The section of weewx.conf configuring your skin would look something like this:
...
[StdReport]
    ...
    [[YourSkinReport]]
        skin = YourSkin
        lang = fr
    ...
With lang = fr the report is in French. To get it in English, replace the language code fr by the code for English en. And to get it in German use de.
To make this all work a language file has to be created for each supported language. The language files reside in the lang subdirectory of the skin directory that is defined by the skin option. The file name of the language file is the language code appended by .conf, for example en.conf, de.conf, or fr.conf.
The language file has the same layout as skin.conf, i.e. you can put language specific versions of the labels there. Additionally a section [Texts] can be defined to hold the static texts used in the skin. For the example above the language files would contain the following:
en.conf
...
[Texts]
    "Current Conditions" = Current Conditions
    ...
de.conf
...
[Texts]
    "Current Conditions" = Aktuelle Werte
    ...
fr.conf
...
[Texts]
    "Current Conditions" = Conditions actuelles
    ...
While it is not technically necessary, we recommend using the whole English text for the key. This makes the template easier to read, and easier for the translator. In the absence of a translation, it will also be the default, so the skin will still be usable, even if a translation is not available.
See the subdirectory SKIN_ROOT/Seasons/lang for examples of language files.
Context sensitive lookups: $pgettext()
A common problem is that the same string may have different translations, depending on its context. For example, in English, the word "Altitude" is used to mean both height above sea level, and the angle of a heavenly body from the horizon, but that's not necessarily true in other languages. For example, in Thai, "ระดับความสูง" is used to mean the former, "อัลติจูด" the latter. The function pgettext() (the "p" stands for particular) allows you to distinguish between the two. Its semantics are very similar to the GNU and Python versions of the function. Here's an example:
            <p>$pgettext("Geographical","Altitude"): $station.altitude</p>
            <p>$pgettext("Astronomical","Altitude"): $almanac.moon.alt</p>
The [Texts] section of the language file should then contain a subsection for each context. For example, the Thai language file would include:
[Texts]
    ...
    [[Geographical]]
        "Altitude" = "ระดับความสูง"    # As in height above sea level
    [[Astronomical]]
        "Altitude" = "อัลติจูด"         # As in angle above the horizon
    ...
Almanac
If module pyephem has been installed, then WeeWX can generate extensive almanac information for the Sun, Moon, Venus, Mars, Jupiter, and other heavenly bodies, including their rise, transit and set times, as well as their azimuth and altitude. Other information is also available.
Here is an example template:
Current time is $current.dateTime
#if $almanac.hasExtras
Sunrise, transit, sunset: $almanac.sun.rise $almanac.sun.transit $almanac.sun.set
Moonrise, transit, moonset: $almanac.moon.rise $almanac.moon.transit $almanac.moon.set
Mars rise, transit, set: $almanac.mars.rise $almanac.mars.transit $almanac.mars.set
Azimuth, altitude of mars: $almanac.mars.az $almanac.mars.alt
Next new, full moon: $almanac.next_new_moon $almanac.next_full_moon
Next summer, winter solstice: $almanac.next_summer_solstice $almanac.next_winter_solstice
#else
Sunrise, sunset: $almanac.sunrise $almanac.sunset
#end if
If pyephem is installed this would result in:
Current time is 29-Mar-2011 09:20
Sunrise, transit, sunset: 06:51 13:11 19:30
Moonrise, transit,
moonset: 04:33 09:44 15:04
Mars rise, transit, set: 06:35 12:30 18:26
Azimuth, altitude of mars:
124.354959275 26.4808431952
Next new, full moon: 03-Apr-2011 07:32 17-Apr-2011 19:43
Next summer,
winter solstice: 21-Jun-2011 10:16 21-Dec-2011 21:29
Otherwise, a fallback of basic calculations is used, resulting in:
Current time is 29-Mar-2011 09:20
Sunrise, sunset: 06:51 19:30
As shown in the example, you can test whether this extended almanac information is available with the value $almanac.hasExtras.
The almanac information falls into three categories:
- Calendar events
- Heavenly bodies
- Functions
We will cover each of these separately.
Calendar events
"Calendar events" do not require a heavenly body. They cover things such as next_solstice, next_first_quarter_moon or sidereal_time. The syntax here is:
$almanac.next_solstice
or
$almanac.next_first_quarter_moon
or
$almanac.sidereal_time
Here is a table of the information that falls into this category:
| previous_equinox | next_equinox | previous_solstice | next_solstice |
| previous_autumnal_equinox | next_autumnal_equinox | previous_vernal_equinox | next_vernal_equinox |
| previous_winter_solstice | next_winter_solstice | previous_summer_solstice | next_summer_solstice |
| previous_new_moon | next_new_moon | previous_first_quarter_moon | next_first_quarter_moon |
| previous_full_moon | next_full_moon | previous_last_quarter_moon | next_last_quarter_moon |
| sidereal_time |
Note
The tag $almanac.sidereal_time returns a value in
decimal degrees rather than a customary value from 0 to 24 hours.
Heavenly bodies
The second category does require a heavenly body. This covers queries such as, "When does Jupiter rise?" or, "When does the sun transit?" Examples are
$almanac.jupiter.rise
or
$almanac.sun.transit
To accurately calculate these times, WeeWX automatically uses the present temperature and pressure to calculate refraction effects. However, you can override these values, which will be necessary if you wish to match the almanac times published by the Naval Observatory as explained in the pyephem documentation. For example, to match the sunrise time as published by the Observatory, instead of
$almanac.sun.rise
use
$almanac(pressure=0, horizon=-34.0/60.0).sun.rise
By setting pressure to zero we are bypassing the refraction calculations and manually setting the horizon to be 34 arcminutes lower than the normal horizon. This is what the Navy uses.
If you wish to calculate the start of civil twilight, you can set the horizon to -6 degrees, and also tell WeeWX to use the center of the sun (instead of the upper limb, which it normally uses) to do the calcuation:
$almanac(pressure=0, horizon=-6).sun(use_center=1).rise
The general syntax is:
$almanac(almanac_time=time,            ## Unix epoch time
         lat=latitude, lon=longitude,  ## degrees
         altitude=altitude,            ## meters
         pressure=pressure,            ## mbars
         horizon=horizon,              ## degrees
         temperature=temperature_C     ## degrees C
       ).heavenly_body(use_center=[01]).attribute
As you can see, many other properties can be overridden besides pressure and the horizon angle.
PyEphem offers an extensive list of objects that can be used for the heavenly_body tag. All the planets and many stars are in the list.
The possible values for the attribute tag are listed in the following table:
| az | alt | a_ra | a_dec |
| g_ra | ra | g_dec | dec |
| elong | radius | hlong | hlat |
| sublat | sublong | next_rising | next_setting |
| next_transit | next_antitransit | previous_rising | previous_setting |
| previous_transit | previous_antitransit | rise | set |
| transit | visible | visible_change |
Note
The tags ra, a_ra and g_ra return values in decimal degrees rather than customary values from 0 to 24 hours.
Functions
There is actually one one function in this category: separation. It returns the angular separation between two heavenly bodies. For example, to calculate the angular separation between Venus and Mars you would use:
<p>The separation between Venus and Mars is
      $almanac.separation(($almanac.venus.alt,$almanac.venus.az), ($almanac.mars.alt,$almanac.mars.az))</p>
This would result in:
The separation between Venus and Mars is 55:55:31.8
Adding new bodies to the almanac
It is possible to extend the WeeWX almanac, adding new bodies that it was not previously aware of. For example, say we wanted to add 433 Eros, the first asteroid visited by a spacecraft. Here is the process:
-
Put the following in the file user/extensions.py:
import ephem
eros = ephem.readdb("433 Eros,e,10.8276,304.3222,178.8165,1.457940,0.5598795,0.22258902,71.2803,09/04.0/2017,2000,H11.16,0.46")
ephem.Eros = eros
This does two things: it adds orbital information about 433 Eros to the internal pyephem database, and it makes that data available under the name Eros (note the capital letter). -
You can then use 433 Eros like any other body in your templates. For example, to display when
it will rise above the horizon:
$almanac.eros.rise
Wind
Wind deserves a few comments because it is stored in the database in two different ways: as a set of scalars, and as a vector of speed and direction. Here are the four wind-related scalars stored in the main archive database:
| Archive type | Meaning | Valid contexts |
| windSpeed | The average wind speed seen during the archive period. | $current, $latest, $hour, $day, $week, $month, $year, $rainyear |
| windDir | If software record generation is used, this is the vector average over the archive period. If hardware record generation is used, the value is hardware dependent. | |
| windGust | The maximum (gust) wind speed seen during the archive period. | |
| windGustDir | The direction of the wind when the gust was observed. |
Some wind aggregation types, notably vecdir and vecavg, require wind speed and direction. For these, WeeWX provides a composite observation type called wind. It is stored directly in the daily summaries, but synthesized for aggregations other than multiples of a day.
| Daily summary type | Meaning | Valid contexts |
| wind | A vector composite of the wind. | $hour, $day, $week, $month, $year, $rainyear |
Any of these can be used in your tags. Here are some examples:
| Tag | Meaning |
| $current.windSpeed | The average wind speed over the most recent archive interval. |
| $current.windDir | If software record generation is used, this is the vector average over the archive interval. If hardware record generation is used, the value is hardware dependent. |
| $current.windGust | The maximum wind speed (gust) over the most recent archive interval. |
| $current.windGustDir | The direction of the gust. |
| $day.windSpeed.avg $day.wind.avg |
The average wind speed since midnight. If the wind blows east at 5 m/s for 2 hours, then west at 5 m/s for 2 hours, the average wind speed is 5 m/s. |
| $day.wind.vecavg | The vector average wind speed since midnight. If the wind blows east at 5 m/s for 2 hours, then west at 5 m/s for 2 hours, the vector average wind speed is zero. |
| $day.wind.vecdir | The direction of the vector averaged wind speed. If the wind blows northwest at 5 m/s for two hours, then southwest at 5 m/s for two hours, the vector averaged direction is west. |
| $day.windGust.max $day.wind.max |
The maximum wind gust since midnight. |
| $day.wind.gustdir | The direction of the maximum wind gust. |
| $day.windGust.maxtime $day.wind.maxtime |
The time of the maximum wind gust. |
| $day.windSpeed.max | The max average wind speed. The wind is averaged over each of the archive intervals. Then the maximum of these values is taken. Note that this is not the same as the maximum wind gust. |
| $day.windDir.avg | Not a very useful quantity. This is the strict, arithmetic average of all the compass wind directions. If the wind blows at 350° for two hours then at 10° for two hours, then the scalar average wind direction will be 180° — probably not what you expect, nor want. |
Defining new tags
We have seen how you can change a template and make use of the various tags available such as $day.outTemp.max for the maximum outside temperature for the day. But, what if you want to introduce some new data for which no tag is available?
If you wish to introduce a static tag, that is, one that will not change with time (such as a Google analytics Tracker ID, or your name), then this is very easy: simply put it in section [Extras] in the skin configuration file. More information on how to do this can be found there.
But, what if you wish to introduce a more dynamic tag, one that requires some calculation, or perhaps uses the database? Simply putting it in the [Extras] section won't do, because then it cannot change.
The answer is to write a search list extension. Complete directioins on how to do this are in a companion document Writing search list extensions.
The Image generator
This section gives an overview of the Image generator. For details about each of its various options, see the section [ImageGenerator] in the Reference: report options.
The installed version of WeeWX is configured to generate a set of useful plots. But, what if you don't like how they look, or you want to generate different plots, perhaps with different aggregation types? This section covers how to do this.
Image generation is controlled by the section [ImageGenerator] in the skin configuration file skin.conf. Let's take a look at the beginning part of this section. It looks like this:
[ImageGenerator]
    ...
    image_width = 500
    image_height = 180
    image_background_color = #f5f5f5

    chart_background_color = #d8d8d8
    chart_gridline_color = #a0a0a0
    ...
The options right under the section name [ImageGenerator] will apply to all plots, unless overridden in subsections. So, unless otherwise changed, all plots will be 500 pixels in width, 180 pixels in height, and will have an RGB background color of #f5f5f5, a very light gray (HTML color "WhiteSmoke"). The chart itself will have a background color of #d8d8d8 (a little darker gray), and the gridlines will be #a0a0a0 (still darker). The other options farther down (not shown) will also apply to all plots.
Time periods
After the "global" options at the top of section [ImageGenerator], comes a set of sub-sections, one for each time period (day, week, month, and year). These sub-sections define the nature of aggregation and plot types for that time period. For example, here is a typical set of options for sub-section [[month_images]]. It controls which "monthly" images will get generated, and what they will look like:
    [[month_images]]
        x_label_format = %d
        bottom_label_format = %m/%d/%y %H:%M
        time_length = 2592000    # == 30 days
        aggregate_type = avg
        aggregate_interval = 10800    # == 3 hours
        show_daynight = false
The option x_label_format gives a strftime() type format for the x-axis. In this example, it will only show days (format option %d). The bottom_label_format is the format used to time stamp the image at the bottom. In this example, it will show the time as something like 10/25/09 15:35. A plot will cover a nominal 30 days, and all items included in it will use an aggregate type of averaging over 3 hours. Finally, by setting option show_daynight to false, we are requesting that day-night, shaded bands not be shown.
Image files
Within each time period sub-section is another nesting, one for each image to be generated. The title of each sub-sub-section is the filename to be used for the image. Finally, at one additional nesting level (!) are the logical names of all the line types to be drawn in the image. Like elsewhere, the values specified in the level above can be overridden. For example, here is a typical set of options for sub-sub-section [[[monthrain]]]:
        [[[monthrain]]]
            plot_type = bar
            yscale = None, None, 0.02
            [[[[rain]]]]
                aggregate_type = sum
                aggregate_interval = day
                label = Rain (daily total)
This will generate an image file with name monthrain.png. It will be a bar plot. Option yscale controls the y-axis scaling — if left out, the scale will automatically be chosen. However, in this example we are choosing to exercise some degree of control by specifying values explicitly. The option is a 3-way tuple (ylow, yhigh, min_interval), where ylow and yhigh are the minimum and maximum y-axis values, respectively, and min_interval is the minimum tick interval. If set to None, the corresponding value will be automatically chosen. So, in this example, the setting
yscale = None, None, 0.02
will cause WeeWX to pick sensible y minimum and maximum values, but require that the tick increment (min_interval) be at least 0.02.
Continuing on with the example above, there will be only one plot "line" (it will actually be a series of bars) and it will have logical name rain. Because we have not said otherwise, the database column name to be used for this line will be the same as its logical name, that is, rain, but this can be overridden. The aggregation type will be summing (overriding the averaging specified in sub-section [[month_images]]), so you get the total rain over the aggregate period (rather than the average) over an aggregation interval of 86,400 seconds (one day). The plot line will be titled with the indicated label of 'Rain (daily total)'. The result of all this is the following plot:
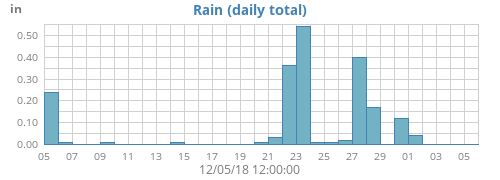
Including more than one type in a plot
More than one observation can be included in a plot. For example, here is how to generate a plot with the week's outside temperature as well as dewpoint:
[[[monthtempdew]]]
    [[[[outTemp]]]]
    [[[[dewpoint]]]]
This would create an image in file monthtempdew.png that includes a line plot of both outside temperature and dewpoint:
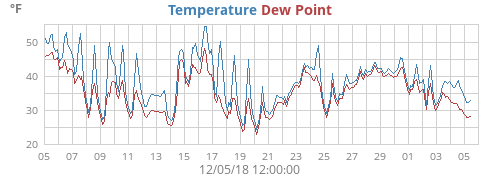
Including a type more than once in a plot
Another example. Say you want a plot of the day's temperature, overlaid with hourly averages. Here, you are using the same data type (outTemp) for both plot lines, the first with averages, the second without. If you do the obvious it won't work:
## WRONG ##
[[[daytemp_with_avg]]]
    [[[[outTemp]]]]
        aggregate_type = avg
        aggregate_interval = hour
    [[[[outTemp]]]]  # OOPS! The same section name appears more than once!
The option parser does not allow the same section name (outTemp in this case) to appear more than once at a given level in the configuration file, so an error will be declared (technical reason: formally, the sections are an unordered dictionary). If you wish for the same observation to appear more than once in a plot then there is a trick you must know: use option data_type. This will override the default action that the logical line name is used for the database column. So, our example would look like this:
[[[daytemp_with_avg]]]
    [[[[avgTemp]]]]
        data_type = outTemp
        aggregate_type = avg
        aggregate_interval = hour
        label = Avg. Temp.
    [[[[outTemp]]]]
Here, the first plot line has been given the name avgTemp to distinguish it from the second line outTemp. Any name will do — it just has to be different. We have specified that the first line will use data type outTemp and that it will use averaging over a one hour period. The second also uses outTemp, but will not use averaging.
The result is a nice plot of the day's temperature, overlaid with a one hour smoothed average:
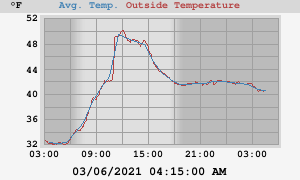
One more example. This one shows daily high and low temperatures for a year:
[[year_images]]
    [[[yearhilow]]]
        [[[[hi]]]]
            data_type = outTemp
            aggregate_type = max
            label = High
        [[[[low]]]]
            data_type = outTemp
            aggregate_type = min
            label = Low Temperature
This results in the plot yearhilow.png:

Including arbitrary expressions
The option data_type can actually be any arbitrary SQL expression, which is valid in the context of the available types in the schema. For example, say you wanted to plot the difference between inside and outside temperature for the year. This could be done with:
[[year_images]]
    [[[yeardiff]]]
        [[[[diff]]]]
            data_type = inTemp-outTemp
            label = Inside - Outside
Note that the option data_type is now an expression representing the difference between inTemp and outTemp, the inside and outside temperature, respectively. This results in a plot yeardiff.png:
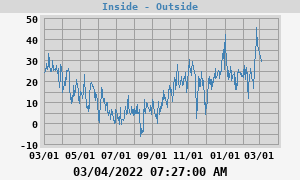
Changing the unit used in a plot
Normally, the unit used in a plot is set by the unit group of the observation types in the plot. For example, consider this plot of today's outside temperature and dewpoint:
    [[day_images]]
        ...
        [[[daytempdew]]]
            [[[[outTemp]]]]
            [[[[dewpoint]]]]
Both outTemp and dewpoint belong to unit group group_temperature, so this plot will use whatever unit has been specified for that group. See the section Mixed units for details.
However, supposed you'd like to offer both Metric and US Customary versions of the same plot? You can do this by using option unit to override the unit used for individual plots:
    [[day_images]]
        ...
        [[[daytempdewUS]]]
            unit = degree_F
            [[[[outTemp]]]]
            [[[[dewpoint]]]]

        [[[daytempdewMetric]]]
            unit = degree_C
            [[[[outTemp]]]]
            [[[[dewpoint]]]]
This will produce two plots: file daytempdewUS.png will be in degrees Fahrenheit, while file dayTempMetric.png will use degrees Celsius.
Line gaps
If there is a time gap in the data, the option line_gap_fraction controls how line plots will be drawn. Here's what a plot looks like without and with this option being specified:
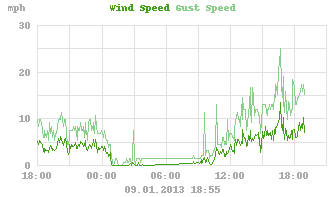
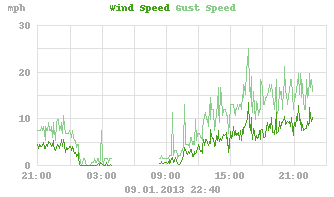
Progressive vector plots
WeeWX can produce progressive vector plots as well as the more conventional x-y plots. To produce these, use plot type vector. You need a vector type to produce this kind of plot. There are two: windvec, and windgustvec. While they do not actually appear in the database, WeeWX understands that they represent special vector-types. The first, windvec, represents the average wind in an archive period, the second, windgustvec the max wind in an archive period. Here's how to produce a progressive vector for one week that shows the hourly biggest wind gusts, along with hourly averages:
[[[weekgustoverlay]]]
    aggregate_interval = hour
    [[[[windvec]]]]
        label = Hourly Wind
        plot_type = vector
        aggregate_type = avg
    [[[[windgustvec]]]]
        label = Gust Wind
        plot_type = vector
        aggregate_type = max
This will produce an image file with name weekgustoverlay.png. It will consist of two progressive vector plots, both using hourly aggregation (3,600 seconds). For the first set of vectors, the hourly average will be used. In the second, the max of the gusts will be used:
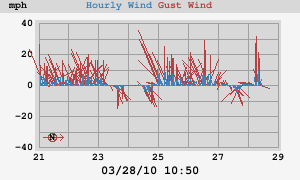
By default, the sticks in the progressive wind plots point towards the wind source. That is, the stick for a wind from the west will point left. If you have a chronic wind direction (as I do), you may want to rotate the default direction so that all the vectors do not line up over the x-axis, overlaying each other. Do this by using option vector_rotate. For example, with my chronic westerlies, I set vector_rotate to 90.0 for the plot above, so winds out of the west point straight up.
If you use this kind of plot (the out-of-the-box version of WeeWX includes daily, weekly, monthly, and yearly progressive wind plots), a small compass rose will be put in the lower-left corner of the image to show the orientation of North.
Overriding values
Remember that values at any level can override values specified at a higher level. For example, say you want to generate the standard plots, but for a few key observation types such as barometer, you want to also generate some oversized plots to give you extra detail, perhaps for an HTML popup. The standard weewx.conf file specifies plot size of 300x180 pixels, which will be used for all plots unless overridden:
[ImageGenerator]
    ...
    image_width = 300
    image_height = 180
The standard plot of barometric pressure will appear in daybarometer.png:
[[[daybarometer]]]
    [[[[barometer]]]]
We now add our special plot of barometric pressure, but specify a larger image size. This image will be put in file daybarometer_big.png.
[[[daybarometer_big]]]
    image_width  = 600
    image_height = 360
    [[[[barometer]]]]
Using multiple bindings
It's easy to use more than one database in your reports. Here's an example. In my office I have two consoles: a VantagePro2 connected to a Dell Optiplex, and a WMR100N, connected to a Raspberry Pi. Each is running WeeWX. The Dell is using SQLite, the RPi, MySQL.
Suppose I wish to compare the inside temperatures of the two consoles. How would I do that?
It's easier to access MySQL across a network than SQLite, so let's run the reports on the Dell, but access the RPi's MySQL database remotely. Here's how the bindings and database sections of weewx.conf would look on the Dell:
[DataBindings]
    # This section binds a data store to an actual database

    [[wx_binding]]
        # The database to be used - it should match one of the sections in [Databases]
        database = archive_sqlite
        # The name of the table within the database
        table_name = archive
        # The class to manage the database
        manager = weewx.manager.DaySummaryManager
        # The schema defines to structure of the database contents
        schema = schemas.wview_extended.schema

    [[wmr100_binding]]
        # Binding for my WMR100 on the RPi
        database = rpi_mysql
        # The name of the table within the database
        table_name = archive
        # The class to manage the database
        manager = weewx.manager.DaySummaryManager
        # The schema defines to structure of the database contents
        schema = schemas.wview_extended.schema

[Databases]
    # This section binds to the actual database to be used

    [[archive_sqlite]]
        database_type = SQLite
        database_name = weewx.sdb

    [[rpi_mysql]]
        database_type = MySQL
        database_name = weewx
        host = rpi-bug

[DatabaseTypes]
    #   This section defines defaults for the different types of databases.

    [[SQLite]]
        driver = weedb.sqlite
        # Directory in which the database files are located
        SQLITE_ROOT = %(WEEWX_ROOT)s/archive

    [[MySQL]]
        driver = weedb.mysql
        # The host where the database is located
        host = localhost
        # The user name for logging in to the host
        user = weewx
        # The password for the user name
        password = weewx
The two additions have been highlighted. The first, [[wmr100_binding]], adds a new binding called wmr10_binding. It links ("binds") to the new database, called rpi_mysql, through the option database. It also defines some characteristics of the binding, such as which manager is to be used and what its schema looks like.
The second addition, [[rpi-mysql]] defines the new database. Option database_type is set to MySQL, indicating that it is a MySQL database. Defaults for MySQL databases are defined in the section [[MySQL]]. The new database accepts all of them, except for host, which as been set to the remote host rpi-bug, the name of my Raspberry Pi.
Explicit binding in tags
How do we use this new binding? First, let's do a text comparison, using tags. Here's what our template looks like:
<table>
  <tr>
    <td class="stats_label">Inside Temperature, Vantage</td>
    <td class="stats_data">$current.inTemp</td>
  </tr>
  <tr>
    <td class="stats_label">Inside Temperature, WMR100</td>
    <td class="stats_data">$latest($data_binding='wmr100_binding').inTemp</td>
  </tr>
</table>
The explicit binding to wmr100_binding is highlighted. This tells the reporting engine to override the default binding specifed in [StdReport], generally wx_binding, and use wmr100_binding instead.
This results in an HTML output that looks like:
| Inside Temperature, Vantage | 68.7°F |
| Inside Temperature, WMR100 | 68.9°F |
Explicit binding in images
How would we produce a graph of the two different temperatures? Here's what the relevant section of the skin.conf file would look like.
[[[daycompare]]]
   [[[[inTemp]]]]
       label = Vantage inTemp
   [[[[WMR100Temp]]]]
       data_type = inTemp
       data_binding = wmr100_binding
       label = WMR100 inTemp
This will produce an image with name daycompare.png, with two plot lines. The first will be of the temperature from the Vantage. It uses the default binding, wx_binding, and will be labeled Vantage inTemp. The second explicitly uses the wmr100_binding. Because it uses the same variable name (inTemp) as the first line, we had to explicitly specify it using option data_type, in order to avoid using the same sub-section name twice (see the section Including a type more than once in a plot for details). It will be labeled WMR100 inTemp. The results look like this:
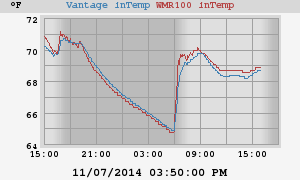
Stupid detail
At first, I could not get this example to work. The problem turned out to be that the RPi was processing things just a beat behind the Dell, so the temperature for the "current" time wasn't ready when the Dell needed it. I kept getting N/A. To avoid this, I introduced the tag $latest, which uses the last available timestamp in the binding, which may or may not be the same as what $current uses. That's why the example above uses $latest instead of $current.
Localization
This section provides suggestions for localization, including translation to different languages and display of data in formats specific to a locale.
If the skin has been internationalized
All of the skins that come with WeeWX have been internationalized, although they may not have been localized to your specific language. See the section Internationalized skins for how to tell.
Internationalized, your language is available
This is the easy case: the skin has been internationalized, and your locale is available. In this case, all you need to do is to select your locale in weewx.conf. For example, to select German (code de) for the Seasons skin, just add the highlighted line (or change, if it's already there):
...
[StdReport]
    ...
    [[SeasonsReport]]
        # The SeasonsReport uses the 'Seasons' skin, which contains the
        # images, templates and plots for the report.
        skin = Seasons
        enable = true
        lang = de
        ...
Internationalized, but your language is missing
If the lang subdirectory is present in the skin directory, then the skin has been internationalized. However, if your language code is not included in the subdirectory, then you will have to localize it to your language. To do so, copy the file en.conf and name it according to the language code of your language. Then translate all the strings on the right side of the equal signs to your language. For example, say you want to localize the skin in the French language. Then copy en.conf to fr.conf
cp en.conf fr.conf
Then change things that look like this:
...
[Texts]
    "Language" = "English"

    "7-day" = "7-day"
    "24h" = "24h"
    "About this weather station" = "About this weather station"
    ...
to something that looks like this:
...
[Texts]
    Language = French

    "7-day" = "7-jours"
    "24h" = "24h"
    "About this weather station" = "A propos de cette station"
    ...
And so on. When you're done, the skin author may be interested in your localization file to ship it together with the skin for the use of other users. If the skin is one that came with WeeWX, contact the WeeWX team via a post to the weewx-user group and, with your permission, we may include your localization file in a future WeeWX release.
Finally, set the option lang in weewx.conf to your language code (fr in this example) as described in the User's Guide.
How to internationalize a skin
What happens when you come across a skin that you like, but it has not been internationalized? This section explains how to convert the report to local formats and language.
Internationalization of WeeWX templates uses a pattern very similar to the well-known GNU "gettext" approach. The only difference is that we have leveraged the ConfigObj facility used throughout WeeWX.
Create the localization file
Create a subdirectory called lang in the skin directory. Then create a file named by the language code with the suffix .conf. For example, if you want to translate to Spanish, name the file es.conf. Include the following in the file:
[Units]

    [[Labels]]

        # These are singular, plural
        meter             = " meter",  " meters"
        day               = " day",    " days"
        hour              = " hour",   " hours"
        minute            = " minute", " minutes"
        second            = " second", " seconds"

    [[Ordinates]]

        # Ordinal directions. The last one should be for no wind direction
        directions = N, NNE, NE, ENE, E, ESE, SE, SSE, S, SSW, SW, WSW, W, WNW, NW, NNW, N/A

[Labels]

    # Set to hemisphere abbreviations suitable for your location:
    hemispheres = N, S, E, W

    # Generic labels, keyed by an observation type.
    [[Generic]]
        altimeter              = Altimeter                # QNH
        altimeterRate          = Altimeter Change Rate
        appTemp                = Apparent Temperature
        appTemp1               = Apparent Temperature
        barometer              = Barometer                # QFF
        barometerRate          = Barometer Change Rate
        cloudbase              = Cloud Base
        dateTime               = Time
        dewpoint               = Dew Point
        ET                     = ET
        extraTemp1             = Temperature1
        extraTemp2             = Temperature2
        extraTemp3             = Temperature3
        heatindex              = Heat Index
        inDewpoint             = Inside Dew Point
        inHumidity             = Inside Humidity
        inTemp                 = Inside Temperature
        interval               = Interval
        lightning_distance     = Lightning Distance
        lightning_strike_count = Lightning Strikes
        outHumidity            = Outside Humidity
        outTemp                = Outside Temperature
        pressure               = Pressure                 # QFE
        pressureRate           = Pressure Change Rate
        radiation              = Radiation
        rain                   = Rain
        rainRate               = Rain Rate
        THSW                   = THSW Index
        UV                     = UV Index
        wind                   = Wind
        windchill              = Wind Chill
        windDir                = Wind Direction
        windGust               = Gust Speed
        windGustDir            = Gust Direction
        windgustvec            = Gust Vector
        windrun                = Wind Run
        windSpeed              = Wind Speed
        windvec                = Wind Vector


[Almanac]

    # The labels to be used for the phases of the moon:
    moon_phases = New, Waxing crescent, First quarter, Waxing gibbous, Full, Waning gibbous, Last quarter, Waning crescent

[Texts]

    Language              = Español # Replace with the language you are targeting
Go through the file, translating all phrases on the right-hand side of the equal signs to your target language (Spanish in this example).
Internationalize the template
You will need to internationalize every HTML template (these typically have a file suffix of .html.tmpl). This is most easily done by opening the template and the language file in different editor windows. It is much easier if you can change both files simultaneously.
Change the html lang attribute
At the top of the template, change the HTML "lang" attribute to a configurable value.
<!DOCTYPE html>
<html lang="$lang">
  <head>
    <meta charset="UTF-8">
    ...
The value $lang will get replaced by the actual language to be used.
Change the body text
The next step is to go through the templates and change all natural language phrases into lookups using $gettext. For example, suppose your skin has a section that looks like this:
<div>
    Current Conditions
    <table>
        <tr>
            <td>Outside Temperature</td>
            <td>$current.outTemp</td>
        </tr>
    </table>
</div>
There are two natural language phrases here: Current Conditions and Outside Temperature. They would be changed to:
<div>
    $gettext("Current Conditions")
    <table>
        <tr>
            <td>$obs.label.outTemp</td>
            <td>$current.outTemp</td>
        </tr>
    </table>
</div>
We have done two replacements here. For the phrase Current Conditions, we substituted $gettext("Current Conditions"). This will cause the Cheetah Generator to look up the localized version of "Current Conditions" in the localization file and substitute it. We could have done something similar for Outside Temperature, but in this case, we chose to use the localized name for type outTemp, which you should have provided in your localization file, under section [Labels] / [[Generic]].
In the localization file, include the translation for Current Conditions under the [Texts] section:
...
[Texts]

    "Language"           = "Español"
    "Current Conditions" = "Condiciones Actuales"
    ...
Repeat this process for all the strings that you find. Make sure not to replace HTML tags and HTML options.
Think about time
Whenever a time is used in a template, it will need a format. WeeWX comes with the following set of defaults, defined in defaults.py:
[Units]
    ...
    [[TimeFormats]]
        day        = %X
        week       = %X (%A)
        month      = %x %X
        year       = %x %X
        rainyear   = %x %X
        current    = %x %X
        ephem_day  = %X
        ephem_year = %x %X
These defaults will give something readable in every locale, but they may not be very pretty. Therefore, you may want to change them to something more suitable for the locale you are targeting, using the Python strftime() specific directives.
Example: the default time formatting for "Current" conditions is %x %x, which will show today's date as 14/05/21 10:00:00 in the Spanish locale. Suppose you would rather see 14-mayo-2021 10:00. You would add the following to your Spanish localization file es.conf:
...

[Units]
    [[TimeFormats]]
        current = %d-%B-%Y %H:%M

...
Set the environment variable LANG
Finally, you will need to set the environment variable LANG to reflect your locale. For example, assuming you set
$ export LANG=es_ES.UTF-8
before running WeeWX, then the local Spanish names for days of the week and months of the year will be used. The decimal point for numbers will also be modified appropriately.
Customizing the WeeWX service engine
This is an advanced topic intended for those who wish to try their hand at extending the internal engine in WeeWX. Before attempting these examples, you should be reasonably proficient with Python.
Please note that the API to the service engine may change in future versions!
At a high level, WeeWX consists of an engine that is responsible for managing a set of services. A service consists of a Python class which binds its member functions to various events. The engine arranges to have the bound member function called when a specific event happens, such as a new LOOP packet arriving.
The services are specified in lists in the [Engine][[Services]] stanza of the configuration file. The [[Services]] section lists all the services to be run, broken up into different service lists.
These lists are designed to orchestrate the data as it flows through the WeeWX engine. For example, you want to make sure data has been processed by, for example, running it through the quality control service, StdQC, before putting them in the database. Similarly, the reporting system must come after the archiving service. These groups insure that things happen in the proper sequence.
See the table Default services for a list of the services that are normally run.
Modifying an existing service
The service weewx.engine.StdPrint prints out new LOOP and archive packets to the console when they arrive. By default, it prints out the entire record, which generally includes a lot of possibly distracting information and can be rather messy. Suppose you do not like this, and want it to print out only the time, barometer reading, and the outside temperature whenever a new LOOP packet arrives. This could be done by subclassing the default print service StdPrint and overriding member function new_loop_packet().
Create the file user/myprint.py:
from weewx.engine import StdPrint
from weeutil.weeutil import timestamp_to_string

class MyPrint(StdPrint):

    # Override the default new_loop_packet member function:
    def new_loop_packet(self, event):
        packet = event.packet
        print("LOOP: ", timestamp_to_string(packet['dateTime']),
            "BAR=",  packet.get('barometer', 'N/A'),
            "TEMP=", packet.get('outTemp', 'N/A'))
This service substitutes a new implementation for the member function new_loop_packet. This implementation prints out the time, then the barometer reading (or N/A if it is not available) and the outside temperature (or N/A).
You then need to specify that your print service class should be loaded instead of the default StdPrint service. This is done by substituting your service name for StdPrint in service_list, located in [Engine][[Services]]:
[Engine]
    [[Services]]
        ...
        report_services = user.myprint.MyPrint, weewx.engine.StdReport
Note that the report_services must be all on one line. Unfortunately, the parser ConfigObj does not allow options to be continued on to following lines.
Creating a new service
Suppose there is no service that can be easily customized for your needs. In this case, a new one can easily be created by subclassing off the abstract base class StdService, and then adding the functionality you need. Here is an example that implements an alarm, which sends off an email when an arbitrary expression evaluates True.
This example is included in the standard distribution as examples/alarm.py:
import smtplib
import socket
import syslog
import threading
import time
from email.mime.text import MIMEText

import weewx
from weeutil.weeutil import timestamp_to_string, option_as_list
from weewx.engine import StdService


# Inherit from the base class StdService:
class MyAlarm(StdService):
    """Service that sends email if an arbitrary expression evaluates true"""

    def __init__(self, engine, config_dict):
        # Pass the initialization information on to my superclass:
        super(MyAlarm, self).__init__(engine, config_dict)

        # This will hold the time when the last alarm message went out:
        self.last_msg_ts = 0

        try:
            # Dig the needed options out of the configuration dictionary.
            # If a critical option is missing, an exception will be raised and
            # the alarm will not be set.
            self.expression    = config_dict['Alarm']['expression']
            self.time_wait     = int(config_dict['Alarm'].get('time_wait', 3600))
            self.timeout       = int(config_dict['Alarm'].get('timeout', 10))
            self.smtp_host     = config_dict['Alarm']['smtp_host']
            self.smtp_user     = config_dict['Alarm'].get('smtp_user')
            self.smtp_password = config_dict['Alarm'].get('smtp_password')
            self.SUBJECT       = config_dict['Alarm'].get('subject', "Alarm message from weewx")
            self.FROM          = config_dict['Alarm'].get('from', 'alarm@example.com')
            self.TO            = option_as_list(config_dict['Alarm']['mailto'])
            syslog.syslog(syslog.LOG_INFO, "alarm: Alarm set for expression: '%s'" % self.expression)

            # If we got this far, it's ok to start intercepting events:
            self.bind(weewx.NEW_ARCHIVE_RECORD, self.new_archive_record)    # NOTE 1
        except KeyError as e:
            syslog.syslog(syslog.LOG_INFO, "alarm: No alarm set.  Missing parameter: %s" % e)

    def new_archive_record(self, event):
        """Gets called on a new archive record event."""

        # To avoid a flood of nearly identical emails, this will do
        # the check only if we have never sent an email, or if we haven't
        # sent one in the last self.time_wait seconds:
        if not self.last_msg_ts or abs(time.time() - self.last_msg_ts) >= self.time_wait:
            # Get the new archive record:
            record = event.record

            # Be prepared to catch an exception in the case that the expression contains
            # a variable that is not in the record:
            try:                                                              # NOTE 2
                # Evaluate the expression in the context of the event archive record.
                # Sound the alarm if it evaluates true:
                if eval(self.expression, None, record):                       # NOTE 3
                    # Sound the alarm!
                    # Launch in a separate thread so it doesn't block the main LOOP thread:
                    t = threading.Thread(target=MyAlarm.sound_the_alarm, args=(self, record))
                    t.start()
                    # Record when the message went out:
                    self.last_msg_ts = time.time()
            except NameError as e:
                # The record was missing a named variable. Log it.
                syslog.syslog(syslog.LOG_DEBUG, "alarm: %s" % e)

    def sound_the_alarm(self, rec):
        """Sound the alarm in a 'try' block"""

        # Wrap the attempt in a 'try' block so we can log a failure.
        try:
            self.do_alarm(rec)
        except socket.gaierror:
            # A gaierror exception is usually caused by an unknown host
            syslog.syslog(syslog.LOG_CRIT, "alarm: unknown host %s" % self.smtp_host)
            # Reraise the exception. This will cause the thread to exit.
            raise
        except Exception as e:
            syslog.syslog(syslog.LOG_CRIT, "alarm: unable to sound alarm. Reason: %s" % e)
            # Reraise the exception. This will cause the thread to exit.
            raise

    def do_alarm(self, rec):
        """Send an email out"""

        # Get the time and convert to a string:
        t_str = timestamp_to_string(rec['dateTime'])

        # Log the alarm
        syslog.syslog(syslog.LOG_INFO, 'alarm: Alarm expression "%s" evaluated True at %s' % (self.expression, t_str))

        # Form the message text:
        msg_text = 'Alarm expression "%s" evaluated True at %s\nRecord:\n%s' % (self.expression, t_str, str(rec))
        # Convert to MIME:
        msg = MIMEText(msg_text)

        # Fill in MIME headers:
        msg['Subject'] = self.SUBJECT
        msg['From']    = self.FROM
        msg['To']      = ','.join(self.TO)

        try:
            # First try end-to-end encryption
            s = smtplib.SMTP_SSL(self.smtp_host, timeout=self.timeout)
            syslog.syslog(syslog.LOG_DEBUG, "alarm: using SMTP_SSL")
        except (AttributeError, socket.timeout, socket.error):
            syslog.syslog(syslog.LOG_DEBUG, "alarm: unable to use SMTP_SSL connection.")
            # If that doesn't work, try creating an insecure host, then upgrading
            s = smtplib.SMTP(self.smtp_host, timeout=self.timeout)
            try:
                # Be prepared to catch an exception if the server
                # does not support encrypted transport.
                s.ehlo()
                s.starttls()
                s.ehlo()
                syslog.syslog(syslog.LOG_DEBUG,
                              "alarm: using SMTP encrypted transport")
            except smtplib.SMTPException:
                syslog.syslog(syslog.LOG_DEBUG,
                              "alarm: using SMTP unencrypted transport")

        try:
            # If a username has been given, assume that login is required for this host:
            if self.smtp_user:
                s.login(self.smtp_user, self.smtp_password)
                syslog.syslog(syslog.LOG_DEBUG, "alarm: logged in with user name %s" % self.smtp_user)

            # Send the email:
            s.sendmail(msg['From'], self.TO,  msg.as_string())
            # Log out of the server:
            s.quit()
        except Exception as e:
            syslog.syslog(syslog.LOG_ERR, "alarm: SMTP mailer refused message with error %s" % e)
            raise

        # Log sending the email:
        syslog.syslog(syslog.LOG_INFO, "alarm: email sent to: %s" % self.TO)
This service expects all the information it needs to be in the configuration file weewx.conf in a new section called [Alarm]. So, add the following lines to your configuration file:
[Alarm]
    expression = "outTemp < 40.0"
    time_wait = 3600
    smtp_host = smtp.example.com
    smtp_user = myusername
    smtp_password = mypassword
    mailto = auser@example.com, anotheruser@example.com
    from   = me@example.com
    subject = "Alarm message from WeeWX!"
There are three important points to be noted in this example, each marked with a NOTE flag in the code.
- Here is where the binding happens between an event, weewx.NEW_ARCHIVE_RECORD in this example, and a member function, self.new_archive_record. When the event NEW_ARCHIVE_RECORD occurs, the function self.new_archive_record will be called. There are many other events that can be intercepted. Look in the file weewx/__init__.py.
- Some hardware does not emit all possible observation types in every record. So, it's possible that a record may be missing some types that are used in the expression. This try block will catch the NameError exception that would be raised should this occur.
- This is where the test is done for whether or not to sound the alarm. The [Alarm] configuration options specify that the alarm be sounded when outTemp < 40.0 evaluates True, that is when the outside temperature is below 40.0 degrees. Any valid Python expression can be used, although the only variables available are those in the current archive record.
Another example expression could be:
expression = "outTemp < 32.0 and windSpeed > 10.0"
In this case, the alarm is sounded if the outside temperature drops below freezing and the wind speed is greater than 10.0.
Note that units must be the same as whatever is being used in your database. That is, the same as what you specified in option target_unit.
Option time_wait is used to avoid a flood of nearly identical emails. The new service will wait this long before sending another email out.
Email will be sent through the SMTP host specified by option smtp_host. The recipient(s) are specified by the comma separated option mailto.
Many SMTP hosts require user login. If this is the case, the user and password are specified with options smtp_user and smtp_password, respectively.
The last two options, from and subject are optional. If not supplied, WeeWX will supply something sensible. Note, however, that some mailers require a valid "from" email address and the one WeeWX supplies may not satisfy its requirements.
To make this all work, you must first copy the alarm.py file to the user directory. Then tell the engine to load this new service by adding the service name to the list report_services, located in [Engine][[Services]]:
[Engine]
   [[Services]]
        report_services = weewx.engine.StdPrint, weewx.engine.StdReport, user.alarm.MyAlarm
Again, note that the option report_services must be all on one line — the parser ConfigObj does not allow options to be continued on to following lines.
In addition to this example, the distribution also includes a low-battery alarm (lowBattery.py), which is similar, except that it intercepts LOOP events (instead of archiving events).
Adding a second data source
A very common problem is wanting to augment the data from your weather station with data from some other device. Generally, you have two approaches for how to handle this:
- Run two instances of WeeWX, each using its own database and weewx.conf configuration file. The results are then combined in a final report, using WeeWX's ability to use more than one database. See the Wiki entry How to run multiple instances of WeeWX for details on how to do this.
- Run one instance, but use a custom WeeWX service to augment the records coming from your weather station with data from the other device.
This section covers the latter approach.
Suppose you have installed an electric meter at your house and you wish to correlate electrical usage with the weather. The meter has some sort of connection to your computer, allowing you to download the total power consumed. At the end of every archive interval you want to calculate the amount of power consumed during the interval, then add the results to the record coming off your weather station. How would you do this?
Here is the outline of a service that retrieves the electrical consumption data and adds it to the archive record. It assumes that you already have a function download_total_power() that, somehow, downloads the amount of power consumed since time zero.
File user/electricity.py
import weewx
from weewx.engine import StdService

class AddElectricity(StdService):

    def __init__(self, engine, config_dict):

      # Initialize my superclass first:
      super(AddElectricity, self).__init__(engine, config_dict)

      # Bind to any new archive record events:
      self.bind(weewx.NEW_ARCHIVE_RECORD, self.new_archive_record)

      self.last_total = None

    def new_archive_record(self, event):

        total_power = download_total_power()

        if self.last_total:
            net_consumed = total_power - self.last_total
            event.record['electricity'] = net_consumed

        self.last_total = total_power
This adds a new key electricity to the record dictionary and sets it equal to the difference between the amount of power currently consumed and the amount consumed at the last archive record. Hence, it will be the amount of power consumed over the archive interval. The unit should be Watt-hours.
As an aside, it is important that the function download_total_power() does not delay very long because it will sit right in the main loop of the WeeWX engine. If it's going to cause a delay of more than a couple seconds you might want to put it in a separate thread and feed the results to AddElectricity through a queue.
To make sure your service gets run, you need to add it to one of the service lists in weewx.conf, section [Engine], subsection [[Services]].
In our case, the obvious place for our new service is in data_services. When you're done, your section [Engine] will look something like this:
#   This section configures the internal WeeWX engine.

[Engine]

    [[Services]]
        # This section specifies the services that should be run. They are
        # grouped by type, and the order of services within each group
        # determines the order in which the services will be run.
        xtype_services = weewx.wxxtypes.StdWXXTypes, weewx.wxxtypes.StdPressureCooker, weewx.wxxtypes.StdRainRater, weewx.wxxtypes.StdDelta
        prep_services = weewx.engine.StdTimeSynch
        data_services = user.electricity.AddElectricity
        process_services = weewx.engine.StdConvert, weewx.engine.StdCalibrate, weewx.engine.StdQC, weewx.wxservices.StdWXCalculate
        archive_services = weewx.engine.StdArchive
        restful_services = weewx.restx.StdStationRegistry, weewx.restx.StdWunderground, weewx.restx.StdPWSweather, weewx.restx.StdCWOP, weewx.restx.StdWOW, weewx.restx.StdAWEKAS
        report_services = weewx.engine.StdPrint, weewx.engine.StdReport
Customizing the database
For most users the database defaults will work just fine. However, there may be occasions when you may want to add a new observation type to your database, or change its unit system. This section shows you how to do this.
Every relational database depends on a schema to specify which types to include in the database. When a WeeWX database is first created, it uses a Python version of the schema to initialize the database. However, once the database has been created, the schema is read directly from the database and the Python version is not used again — any changes to it will have no effect. This means that the strategy for modifying the schema depends on whether the database already exists.
Specifying a schema for a new database
If the database does not exist yet, then you will want to pick an appropriate starting schema. If it's not exactly what you want, you can modify it to fit your needs.
Picking a starting schema
WeeWX gives you a choice of three different schemas to choose from when creating a new database:
| Name | Number of observation types | Comment |
| schemas.wview.schema | 49 | The original schema that came with wview. |
| schemas.wview_extended.schema | 111 | A version of the wview schema, which has been extended with many new types. This is the default version. |
| schemas.wview_small.schema | 20 | A minimalist version of the wview schema. |
For most users, the default database schema, schemas.wview_extended.schema, will work just fine.
To specify which schema to use when creating a database, modify option schema in section [DataBindings] in weewx.conf. For example, suppose you wanted to use the classic (and smaller) schema schemas.wview.schema instead of the default schemas.wview_extended.schema. Then the section [DataBindings] would look like:
[DataBindings]
    [[wx_binding]]
        database = archive_sqlite
        table_name = archive
        manager = weewx.manager.DaySummaryManager
        schema = schemas.wview.schema
Now, when you start WeeWX, it will use this new choice instead of the default.
NOTE: This only works when the database is first created. Thereafter, WeeWX reads the schema directly from the database. Changing this option will have no effect!
Modifying a starting schema
If none of the three starting schemas that come with WeeWX suits your purposes, you can easily create your own. Just pick one of the three schemas as a starting point, then modify it. Put the results in the user subdirectory, where it will be safe from upgrades. For example, suppose you like the schemas.wview_small schema, but you need to store the type electricity from the example Adding a second data source above. The type electricity does not appear in the schema, so you'll have to add it before starting up WeeWX. We will call the resulting new schema user.myschema.schema.
If you did a Debian install, here's how you would do this:
# Copy the wview_small schema over to the user subdirectory and rename it myschema:
sudo cp /usr/share/weewx/schemas/wview_small.py /usr/share/weewx/user/myschema.py

# Edit it using your favorite text editor
sudo nano /usr/share/weewx/user/myschema.py
If you did a setup.py install, it would look like this:
# Copy the wview_small schema over to the user subdirectory and rename it myschema:
cp /home/weewx/bin/schemas/wview_small.py /home/weewx/bin/user/myschema.py

# Edit it using your favorite text editor
nano /home/weewx/bin/user/myschema.py
In myschema.py change this:
         ...
         ('windchill',            'REAL'),
         ('windDir',              'REAL'),
         ('windGust',             'REAL'),
         ('windGustDir',          'REAL'),
         ('windSpeed',            'REAL'),
         ]
to this
         ...
         ('windchill',            'REAL'),
         ('windDir',              'REAL'),
         ('windGust',             'REAL'),
         ('windGustDir',          'REAL'),
         ('windSpeed',            'REAL'),
         ('electricity',          'REAL'),
         ]
The only change was the addition (highlighted) of electricity to the list of observation names.
Now change option schema under [DataBindings] in weewx.conf to use your new schema:
[DataBindings]
    [[wx_binding]]
        database = archive_sqlite
        table_name = archive
        manager = weewx.manager.DaySummaryManager
        schema = user.myschema.schema
Start WeeWX. When the new database is created, it will use your modified schema instead of the default.
NOTE: This will only work when the database is first created! Thereafter, WeeWX reads the schema directly from the database and your changes will have no effect!
Modifying an existing database
The previous section covers the case where you do not have an existing database, so you modify a starting schema, then use it to initialize the database. But, what if you already have a database, and you want to modify it, perhaps by adding a column or two? You cannot create a new starting schema, because it is only used when the database is first created. Here is where the tool wee_database can be useful. Be sure to stop WeeWX before attempting to use it.
There are two ways to do this. Both are covered below.
- Modify the database in situ by using the tool wee_database. This choice works best for small changes.
- Transfer the old database to a new one while modifying it along the way, again by using the tool wee_database. This choice is best for large modifications.
NOTE: Before using the tool wee_database, MAKE A BACKUP FIRST!
Modify the database in situ
If you want to make some minor modifications to an existing database, perhaps adding or removing a column, then this can easily be done using the tool wee_database with an appropriate option. We will cover the cases of adding, removing, and renaming a type. See the documentation for wee_database for more details.
Adding a type
Suppose you have an existing database and you want to add a type, such as the type electricity from the example above Adding a second data source. This can be done in one easy step using the tool wee_database with the option --add-column:
wee_database --add-column=electricity
The tool not only adds electricity to the main archive table, but also to the daily summaries.
Removing a type
In a similar manner, the tool can remove any unneeded types from an existing database. For example, suppose you are using the schemas.wview schema, but you're pretty sure you're not going to need to store soil moisture. You can drop the unnecessary types this way:
wee_database --drop-columns=soilMoist1,soilMoist2,soilMoist3,soilMoist4
Unlike the option --add-column, the option --drop-columns can take more than one type. This is done in the interest of efficiency: adding new columns is easy and fast with the SQLite database, but dropping columns requires copying the whole database. By specifying more than one type, you can amortize the cost over a single invocation of the utility.
NOTE: Dropping types from a database means you will lose any data associated with them! The data cannot be recovered.
Renaming a type
Suppose you just want to rename a type? This can be done using the option --to-name. Here's an example where you rename soilMoist1 to soilMoistGarden:
wee_database --rename-column=soilMoist1 --to-name=soilMoistGarden
Note how the option --rename-column also requires option --to-name, which specifies the target name.
Transfer database using new schema
If you are making major changes to your database, you may find it easier to create a brand new database using the schema you want, then transfer all data from the old database into the new one. This approach is more work, and takes more processing time than the in situ strategies outlines above, but has the advantage that it leaves behind a record of exactly the schema you are using.
Here is the general strategy of how to do this.
- Create a new schema that includes exactly the types that you want.
- Specify this schema as the starting schema for the database.
- Make sure you have the necessary permissions to create the new database.
- Use the utility wee_database to create the new database and populate it with data from the old database.
- Shuffle databases around so WeeWX will use the new database.
Here are the details:
-
Create a new schema. First step is to create a new schema with exactly the types you want. See the instructions above Modify a starting schema. As an example, suppose your new schema is called user.myschema.schema.
-
Set as starting schema. Set your new schema as the starting schema with whatever database binding you are working with (generally, wx_binding). For example:
[DataBindings] [[wx_binding]] database = archive_sqlite table_name = archive manager = weewx.manager.DaySummaryManager schema = user.myschema.schema -
Check permissions. The reconfiguration utility will create a new database with the same name as the old, except with the suffix _new attached to the end. Make sure you have the necessary permissions to do this. In particular, if you are using MySQL, you will need CREATE privileges.
-
Create and populate the new database. Use the utility wee_database with the --reconfigure option.
wee_database weewx.conf --reconfigure
This will create a new database (nominally, weewx.sdb_new if you are using SQLite, weewx_new if you are using MySQL), using the schema found in user.myschema.schema, and populate it with data from the old database.
-
Shuffle the databases. Now arrange things so WeeWX can find the new database.
Warning!
Make a backup of the data before doing any of the next steps!You can either shuffle the databases around so the new database has the same name as the old database, or edit weewx.conf to use the new database name. To do the former:
For SQLite:
cd SQLITE_ROOT
mv weewx.sdb_new weewx.sdb
For MySQL:
mysql -u <username> --password=<mypassword>
mysql> DROP DATABASE weewx;                             # Delete the old database
mysql> CREATE DATABASE weewx;                           # Create a new one with the same name
mysql> RENAME TABLE weewx_new.archive TO weewx.archive; # Rename to the nominal name
-
It's worth noting that there's actually a hidden, last step: rebuilding the daily summaries inside the new database. This will be done automatically by WeeWX at the next startup. Alternatively, it can be done manually using the wee_database utility and the --rebuild-daily option:
wee_database weewx.conf --rebuild-daily
Changing the unit system in an existing database
Normally, data are stored in the databases using US Customary units, and you shouldn't care; it is an "implementation detail". Data can always be displayed using any set of units you want — the section How to change units explains how to change the reporting units. Nevertheless, there may be special situations where you wish to store the data in Metric units. For example, you may need to allow direct programmatic access to the database from another piece of software that expects metric units.
You should not change the database unit system midstream. That is, do not start with one unit system then, some time later, switch to another. WeeWX cannot handle databases with mixed unit systems — see the section [StdConvert] in the WeeWX User's Guide. However, you can reconfigure the database by copying it to a new database, performing the unit conversion along the way. You then use this new database.
The general strategy is identical to the strategy outlined above in the section Transfer database using new schema. The only difference is that instead of specifying a new starting schema, you specify a different database unit system. This means that instead of steps 1 and 2 above, you edit the configuration file and change option target_unit in section [StdConvert] to reflect your choice. For example, if you are switching to metric units, the option will look like:
[StdConvert]
    target_unit = METRICWX
After changing target_unit, you then go ahead with the rest of the steps. That is run wee_database with the --reconfigure option, then shuffle the databases.
Rebuilding the daily summaries
The wee_database utility can also be used to rebuild the daily summaries:
wee_database weewx.conf --rebuild-daily
In most cases this will be sufficient; however, if anomalies remain in the daily summaries the daily summary tables may be dropped first before rebuilding:
wee_database weewx.conf --drop-daily
The summaries will automatically be rebuilt the next time WeeWX starts, or they can be rebuilt with the utility:
wee_database weewx.conf --rebuild-daily
Customizing units and unit groups
Warning!
This is an area that is changing rapidly in WeeWX. Presently, new units and
unit groups are added by manipulating the internal dictionaries in WeeWX (as described below). In the
future, they may be specified in weewx.conf.
Assigning a unit group
In the examples above, we created a new observation type, electricity, and added it to the database schema. Now we would like to recognize that it is a member of the unit group group_energy (which already exists), so it can enjoy the labels and formats already provided for this group. This is done by extending the dictionary weewx.units.obs_group_dict.
Add the following to our new services file user/electricity.py, just after the last import statement:
import weewx
from weewx.engine import StdService

import weewx.units
weewx.units.obs_group_dict['electricity'] = 'group_energy'

class AddElectricity(StdService):

   # [...]
When our new service gets loaded by the WeeWX engine, these few lines will get run. They tell WeeWX that our new observation type, electricity, is part of the unit group group_energy. Once the observation has been associated with a unit group, the unit labels and other tag syntax will work for that observation. So, now a tag like:
$month.electricity.sum
will return the total amount of electricity consumed for the month, in Watt-hours.
Creating a new unit group
That was an easy one, because there was already an existing group, group_energy, that covered our new observation type. But, what if we are measuring something entirely new, like force with time? There is nothing in the existing system of units that covers things like newtons or pounds. We will have to define these new units, as well as the unit group they can belong to.
We assume we have a new observation type, rocketForce, which we are measuring over time, for a service named Rocket, located in user/rocket.py. We will create a new unit group, group_force, and new units, newton and pound. Our new observation, rocketForce, will belong to group_force, and will be measured in units of newton or pound.
To make this work, we need to add the following to user/rocket.py.
- As before, we start by specifying what group our new observation type belongs to:
import weewx.units
weewx.units.obs_group_dict['rocketForce'] = 'group_force'
- Next, we specify what unit is used to measure force in the three standard unit systems used by weewx.
weewx.units.USUnits['group_force'] = 'pound'
weewx.units.MetricUnits['group_force'] = 'newton'
weewx.units.MetricWXUnits['group_force'] = 'newton'
- Then we specify what formats and labels to use for newton and pound:
weewx.units.default_unit_format_dict['newton'] = '%.1f'
weewx.units.default_unit_format_dict['pound']  = '%.1f'

weewx.units.default_unit_label_dict['newton'] = ' newton'
weewx.units.default_unit_label_dict['pound']  = ' pound'
- Finally, we specify how to convert between them:
weewx.units.conversionDict['newton'] = {'pound':  lambda x : x * 0.224809}
weewx.units.conversionDict['pound']  = {'newton': lambda x : x * 4.44822}
Now, when the service Rocket gets loaded, these lines of code will get executed, adding the necessary unit extensions to WeeWX.
Using the new units
Now you've added a new type of units. How do you use it?
Pretty much like any other units. For example, to do a plot of the month's electric consumption, totaled by day, add this section to the [[month_images]] section of skin.conf:
[[[monthelectric]]]
    [[[[electricity]]]]
        aggregate_type = sum
        aggregate_interval = day
        label = Electric consumption (daily total)
This will cause the generation of an image monthelectric.png, showing a plot of each day's consumption for the past month.
If you wish to use the new type in the templates, it will be available using the same syntax as any other type. Here are some other tags that might be useful:
| Tag | Meaning |
| $day.electricity.sum | Total consumption since midnight |
| $year.electricity.sum | Total consumption since the first of the year |
| $year.electricity.max | The most consumed during any archive period |
| $year.electricity.maxsum | The most consumed during a day |
| $year.electricity.maxsumtime | The day it happened. |
| $year.electricity.sum_ge((5000.0, 'kWh', 'group_energy')) | The number of days of the year where more than 5.0 kWh of energy was consumed. The argument is a ValueTuple. |
Adding new, derived types
In the section Adding a second data source, we saw an example of how to create a new type for a new data source. But, what if you just want to add a type that is a derivation of existing types? The WeeWX type dewpoint is an example of this: it's a function of two observables, outTemp, and outHumidity. WeeWX calculates it automatically for you.
Calculating new, derived types is the job of the WeeWX XTypes system. It can also allow you to add new aggregatioin types.
See the Wiki article WeeWX V4 user defined types for complete details on how the XTypes system works.
Porting to new hardware
Naturally, this is an advanced topic but, nevertheless, I'd like to encourage any Python wizards out there to give it a try. Of course, I have selfish reasons for this: I don't want to have to buy every weather station ever invented, and I don't want my roof to look like a weather station farm!
A driver communicates with hardware. Each driver is a single python file that contains the code that is the interface between a device and WeeWX. A driver may communicate directly with hardware using a MODBus, USB, serial, or other physical interface. Or it may communicate over a network to a physical device or a web service.
General guidelines
- The driver should emit data as it receives it from the hardware (no caching).
- The driver should emit only data it receives from the hardware (no "filling in the gaps").
- The driver should not modify the data unless the modification is directly related to the hardware (e.g., decoding a hardware-specific sensor value).
- If the hardware flags "bad data", then the driver should emit a null value for that datum (Python None).
- The driver should not calculate any derived variables (such as dewpoint). The service StdWXService will do that.
- However, if the hardware emits a derived variable, then the driver should emit it.
Implement the driver
Create a file in the user directory, say mydriver.py. This file will contain the driver class as well as any hardware-specific code. Do not put it in the weewx/drivers directory or it will be deleted when you upgrade WeeWX.
Inherit from the abstract base class weewx.drivers.AbstractDevice. Try to implement as many of its methods as you can. At the very minimum, you must implement the first three methods, loader, hardware_name, and genLoopPackets.
loader
This is a factory function that returns an instance of your driver. It has two arguments: the configuration dictionary, and a reference to the WeeWX engine.
hardware_name
Return a string with a short nickname for the hardware, such as "ACME X90"
genLoopPackets
This should be a Python generator function that yields loop packets, one after another. Don't worry about stopping it: the engine will do this when an archive record is due. A "loop packet" is a dictionary. At the very minimum it must contain keys for the observation time and for the units used within the packet.
| dateTime | The time of the observation in unix epoch time. |
| usUnits | The unit system used. weewx.US for US customary, weewx.METRICWX, or weewx.METRIC for metric. See the Appendix Units for their exact definitions. The dictionaries USUnits, MetricWXUnits, and MetricUnits in file units.py, can also be useful. |
Then include any observation types you have in the dictionary. Every packet need not contain the same set of observation types. Different packets can use different unit systems, but all observations within a packet must use the same unit system. If your hardware is capable of measuing an observation type but, for whatever reason, its value is bad (maybe a bad checksum?), then set its value to None. If your hardware is incapable of measuring an observation type, then leave it out of the dictionary.
A couple of observation types are tricky, in particular, rain. The field rain in a LOOP packet should be the amount of rain that has fallen since the last packet. Because LOOP packets are emitted fairly frequently, this is likely to be a small number. If your hardware does not provide this value, you might have to infer it from changes in whatever value it provides, for example changes in the daily or monthly rainfall.
Wind is another tricky one. It is actually broken up into four different observations: windSpeed, windDir, windGust, and windGustDir. Supply as many as you can. The directions should be compass directions in degrees (0=North, 90=East, etc.).
Be careful when reporting pressure. There are three observations related to pressure. Some stations report only the station pressure, others calculate and report sea level pressures.
| pressure | The Station Pressure (SP), which is the raw, absolute pressure measured by the station. This is the true barometric pressure for the station. |
| barometer | The Sea Level Pressure (SLP) obtained by correcting the Station Pressure for altitude and local temperature. This is the pressure reading most commonly used by meteorologist to track weather systems at the surface, and this is the pressure that is uploaded to weather services by WeeWX. It is the station pressure reduced to mean sea level using local altitude and local temperature. |
| altimeter | The Altimeter Setting (AS) obtained by correcting the Station Pressure for altitude. This is the pressure reading most commonly heard in weather reports. It is not the true barometric pressure of a station, but rather the station pressure reduced to mean sea level using altitude and an assumed temperature average. |
genArchiveRecords()
If your hardware does not have an archive record logger, then WeeWX can do the record generation for you. It will automatically collect all the types it sees in your loop packets then emit a record with the averages (in some cases the sum or max value) of all those types. If it doesn't see a type, then it won't appear in the emitted record.
However, if your hardware does have a logger, then you should implement method genArchiveRecords() as well. It should be a generator function that returns all the records since a given time.
archive_interval
If you implement function genArchiveRecords(), then you should also implement archive_interval as either an attribute, or as a property function. It should return the archive interval in seconds.
getTime()
If your hardware has an onboard clock and supports reading the time from it, then you may want to implement this method. It takes no argument. It should return the time in Unix Epoch Time.
setTime()
If your hardware has an onboard clock and supports setting it, then you may want to implement this method. It takes no argument and does not need to return anything.
closePort()
If the driver needs to close a serial port, terminate a thread, close a database, or perform any other activity before the application terminates, then you must supply this function. WeeWX will call it if it needs to shut down your console (usually in the case of an error).
Define the configuration
You then include a new section in the configuration file weewx.conf that includes any options your driver needs. It should also include an entry driver that points to where your driver can be found. Set option station_type to your new section type and your driver will be loaded.
Examples
The fileparse driver is perhaps the simplest example of a WeeWX driver. It reads name-value pairs from a file and uses the values as sensor 'readings'. The code is actually packaged as an extension, located in examples/fileparse, making it a good example of not only writing a device driver, but also of how to package an extension. The actual driver itself is in examples/fileparse/bin/user/fileparse.py.
Another good example is the simulator code located in weewx/drivers/simulator.py. It's dirt simple and you can easily play with it. Many people have successfully used it as a starting point for writing their own custom driver.
The Ultimeter (ultimeter.py) and WMR100 (wmr100.py) drivers illustrate how to communicate with serial and USB hardware, respectively. They also show different approaches for decoding data. Nevertheless, they are pretty straightforward.
The driver for the Vantage series is by far the most complicated. It actually multi-inherits from not only AbstractDevice, but also StdService. That is, it also participates in the engine as a service.
Naturally, there are a lot of subtleties that have been glossed over in this high-level description. If you run into trouble, look for help in the weewx-development forum.
Extensions
A key feature of WeeWX is its ability to be extended by installing 3rd party extensions. Extensions are a way to package one or more customizations so they can be installed and distributed as a functional group.
Customizations typically fall into one of these categories:
- search list extension
- template
- skin
- service
- generator
- driver
Take a look at the WeeWX wiki for a sampling of some of the extensions that are available.
Creating an extension
Now that you have made some customizations, you might want to share those changes with other WeeWX users. Put your customizations into an extension to make installation, removal, and distribution easier.
Here are a few guidelines for creating extensions:
- Extensions should not modify or depend upon existing skins. An extension should include its own, standalone skin to illustrate any templates, search list extension, or generator features.
- Extensions should not modify the database schemas. If it requires data not found in the default databases, an extension should provide its own database and schema.
Although one extension might use another extension, take care to write the dependent extension so that it fails gracefully. For example, a skin might use data the forecast extension, but what happens if the forecast extension is not installed? Make the skin display a message about "forecast not installed" but otherwise continue to function.
Packaging an extension
The structure of an extension mirrors that of WeeWX itself. If the customizations include a skin, the extension will have a skins directory. If the customizations include python code, the extension will have a bin/user directory.
Each extension should also include:
- readme.txt - a summary of what the extension does, list of pre-requisites (if any), and instructions for installing the extension manually
- changelog - an enumeration of changes in each release
- install.py - python code used by the WeeWX ExtensionInstaller
For example, here is the structure of a skin called basic:
basic/
basic/changelog
basic/install.py
basic/readme.txt
basic/skins/
basic/skins/basic/
basic/skins/basic/basic.css
basic/skins/basic/current.inc
basic/skins/basic/favicon.ico
basic/skins/basic/hilo.inc
basic/skins/basic/index.html.tmpl
basic/skins/basic/skin.conf
Here is the structure of a search list extension called xstats:
xstats/
xstats/changelog
xstats/install.py
xstats/readme.txt
xstats/bin/
xstats/bin/user/
xstats/bin/user/xstats.py
See the extensions directory of the WeeWX source for examples.
To distribute an extension, simply create a compressed archive of the extension directory.
For example, create the compressed archive for the basic skin like this:
tar cvfz basic.tar.gz basic
Once an extension has been packaged, it can be installed using the wee_extension utility.
Default values
Whenever possible, an extension should just work, with a minimum of input from the user. At the same time, parameters for the most frequently requested options should be easily accessible and easy to modify. For skins, this might mean parameterizing strings into [Labels] for easier customization. Or it might mean providing parameters in [Extras] to control skin behavior or to parameterize links.
Some parameters must be specified, and no default value would be appropriate. For example, an uploader may require a username and password, or a driver might require a serial number or IP address. In these cases, use a default value in the configuration that will obviously require modification. The username might default to REPLACE_ME. Also be sure to add a log entry that indicates the feature is disabled until the value has been specified.
In the case of drivers, use the configuration editor to prompt for this type of required value.
Reference: report options
This section contains the options available in the skin configuration file, skin.conf. The same options apply to the language files found in the subdirectory lang, like lang/en.conf for English.
We recommend to put
- options that control the behavior of the skin into skin.conf; and
- language dependent labels and texts into the language files.
The most important options, the ones you are likely to have to customize, are highlighted.
It is worth noting that, like the main configuration file weewx.conf, UTF-8 is used throughout.
[Extras]
This section is available to add any static tags you might want to use in your templates.
As an example, the skin.conf file for the Seasons skin includes three options:
| Skin option | Template tag |
| radar_img | $Extras.radar_img |
| radar_url | $Extras.radar_url |
| googleAnalyticsId | $Extras.googleAnalyticsId |
If you take a look at the template radar.inc you will see examples of testing for these tags.
radar_img
Set to an URL to show a local radar image for your region.
radar_url
If the radar image is clicked, the browser will go to this URL. This is usually used to show a more detailed, close-up, radar picture.
For me in Oregon, setting the two options to:
[Extras]
    radar_img = http://radar.weather.gov/ridge/lite/N0R/RTX_loop.gif
    radar_url = http://radar.weather.gov/ridge/radar.php?product=NCR&rid=RTX&loop=yes
results in a nice image of a radar centered on Portland, Oregon. When you click on it, it gives you a detailed, animated view. If you live in the USA, take a look at the NOAA radar website to find a nice one that will work for you. In other countries, you will have to consult your local weather service.
googleAnalyticsId
If you have a Google Analytics ID, you can set it here. The Google Analytics Javascript code will then be included, enabling analytics of your website usage. If commented out, the code will not be included.
Extending [Extras]
Other tags can be added in a similar manner, including sub-sections. For example, say you have added a video camera and you would like to add a still image with a hyperlink to a page with the video. You want all of these options to be neatly contained in a sub-section.
[Extras]
    [[video]]
        still = video_capture.jpg
        hyperlink = http://www.eatatjoes.com/video.html
Then in your template you could refer to these as:
<a href="$Extras.video.hyperlink">
    <img src="$Extras.video.still" alt="Video capture"/>
</a>
[Labels]
This section defines various labels.
hemispheres
Comma separated list for the labels to be used for the four hemispheres. The default is N, S, E, W.
latlon_formats
Comma separated list for the formatting to be used when converting latitude and longitude to strings. There should be three elements:
- The format to be used for whole degrees of latitude
- The format to be used for whole degrees of longitude
- The format to be used for minutes.
This allows you to decide whether or not you want leading zeroes. The default includes leading zeroes and is "%02d", "%03d", "%05.2f"
[[Generic]]
This sub-section specifies default labels to be used for each observation type. For example, options
inTemp  = Temperature inside the house
outTemp = Outside Temperature
UV      = UV Index
would cause the given labels to be used for plots of inTemp and outTemp. If no option is given, then the observation type itself will be used (e.g., outTemp).
[Almanac]
This section controls what text to use for the almanac. It consists of only one entry
moon_phases
This option is a comma separated list of labels to be used for the eight phases of the moon. Default is New, Waxing crescent, First quarter, Waxing gibbous, Full, Waning gibbous, Last quarter, Waning crescent.
[Units]
This section controls how units are managed and displayed.
[[Groups]]
This sub-section lists all the Unit Groups and specifies which measurement unit is to be used for each one of them.
As there are many different observational measurement types (such as outTemp, barometer, etc.) used in WeeWX (more than 50 at last count), it would be tedious, not to say possibly inconsistent, to specify a different measurement system for each one of them. At the other extreme, requiring all of them to be "U.S. Customary" or "Metric" seems overly restrictive. WeeWX has taken a middle route and divided all the different observation types into 12 different unit groups. A unit group is something like group_temperature. It represents the measurement system to be used by all observation types that are measured in temperature, such as inside temperature (type inTemp), outside temperature (outTemp), dewpoint (dewpoint), wind chill (windchill), and so on. If you decide that you want unit group group_temperature to be measured in degree_C then you are saying all members of its group will be reported in degrees Celsius.
Note that the measurement unit is always specified in the singular. That is, specify degree_C or foot, not degrees_C or feet. See the Appendix: Units for more information, including a concise summary of the groups, their members, and which options can be used for each group.
Which measurement unit to be used for altitude. Possible options are foot or meter.
group_direction
Which measurement unit to be used for direction. The only option is degree_compass.
group_distance
Which measurement unit to be used for distance (such as for wind run). Possible options are mile or km.
group_moisture
The measurement unit to be used for soil moisture. The only option is centibar.
group_percent
The measurement unit to be used for percentages. The only option is percent.
group_pressure
The measurement unit to be used for pressure. Possible options are one of inHg (inches of mercury), mbar, hPa, or kPa.
group_pressurerate
The measurement unit to be used for rate of change in pressure. Possible options are one of inHg_per_hour (inches of mercury per hour), mbar_per_hour, hPa_per_hour, or kPa_per_hour.
group_radiation
The measurement unit to be used for radiation. The only option is watt_per_meter_squared.
group_rain
The measurement unit to be used for precipitation. Options are inch, cm, or mm.
group_rainrate
The measurement unit to be used for rate of precipitation. Possible options are one of inch_per_hour, cm_per_hour, or mm_per_hour.
group_speed
The measurement unit to be used for wind speeds. Possible options are one of mile_per_hour, km_per_hour, knot, meter_per_second, or beaufort.
group_speed2
This group is similar to group_speed, but is used for calculated wind speeds which typically have a slightly higher resolution. Possible options are one mile_per_hour2, km_per_hour2, knot2, or meter_per_second2.
The measurement unit to be used for temperatures. Options are degree_C, degree_E, degree_F, or degree_K.
group_volt
The measurement unit to be used for voltages. The only option is volt.
[[StringFormats]]
This sub-section is used to specify what string format is to be used for each unit when a quantity needs to be converted to a string. Typically, this happens with y-axis labeling on plots and for statistics in HTML file generation. For example, the options
degree_C = %.1f
inch     = %.2f
would specify that the given string formats are to be used when formatting any temperature measured in degrees Celsius or any precipitation amount measured in inches, respectively. The formatting codes are those used by Python, and are very similar to C's sprintf() codes.
You can also specify what string to use for an invalid or unavailable measurement (value None). For example,
NONE = " N/A "
[[Labels]]
This sub-section specifies what label is to be used for each measurement unit type. For example, the options
degree_F = °F
inch     = ' in'
would cause all temperatures to have unit labels °F and all precipitation to have labels in. If any special symbols are to be used (such as the degree sign) they should be encoded in UTF-8. This is generally what most text editors use if you cut-and-paste from a character map.
If the label includes two values, then the first is assumed to be the singular form, the second the plural form. For example,
foot   = " foot",   " feet"
...
day    = " day",    " days"
hour   = " hour",   " hours"
minute = " minute", " minutes"
second = " second", " seconds"
[[TimeFormats]]
This sub-section specifies what time format to use for different time contexts. For example, you might want to use a different format when displaying the time in a day, versus the time in a month. It uses strftime() formats. The default looks like this:
    [[TimeFormats]]
        hour        = %H:%M
        day         = %X
        week        = %X (%A)
        month       = %x %X
        year        = %x %X
        rainyear    = %x %X
        current     = %x %X
        ephem_day   = %X
        ephem_year  = %x %X
The specifiers %x, %X, and %A code locale dependent date, time, and weekday names, respectively. Hence, if you set an appropriate environment variable LANG, then the date and times should follow local conventions (see section Environment variable LANG for details on how to do this). However, the results may not look particularly nice, and you may want to change them. For example, I use this in the U.S.:
    [[TimeFormats]]
        #
        # More attractive formats that work in most Western countries.
        #
        day        = %H:%M
        week       = %H:%M on %A
        month      = %d-%b-%Y %H:%M
        year       = %d-%b-%Y %H:%M
        rainyear   = %d-%b-%Y %H:%M
        current    = %d-%b-%Y %H:%M
        ephem_day  = %H:%M
        ephem_year = %d-%b-%Y %H:%M
The last two formats, ephem_day and ephem_year allow the formatting to be set for almanac times The first, ephem_day, is used for almanac times within the day, such as sunrise or sunset. The second, ephem_year, is used for almanac times within the year, such as the next equinox or full moon.
[[Ordinates]]
directions
Set to the abbreviations to be used for ordinal directions. By default, this is N, NNE, NE, ENE, E, ESE, SE, SSE, S, SSW, SW, WSW, W, WNW, NW, NNW, N.
[[DegreeDays]]
heating_base
cooling_base
growing_base
Set to the base temperature for calculating heating, cooling, and growing degree-days, along with the unit to be used. Examples:
heating_base = 65.0, degree_F
cooling_base = 20.0, degree_C
growing_base = 50.0, degree_F
[[Trend]]
time_delta
Set to the time difference over which you want trends to be calculated. The default is 3 hours.
time_grace
When searching for a previous record to be used in calculating a trend, a record within this amount of time_delta will be accepted. Default is 300 seconds.
[Texts]
The section [Texts] holds static texts that are used in the templates. Generally there are multiple language files, one for each supported language, named by the language codes defined in ISO 639-1. The entries give the translation of the texts to the target language. For example,
[Texts]
    "Current Conditions" = "Aktuelle Werte"
would cause "Aktuelle Werte" to be used whereever $gettext("Current Conditions" appeared. See the section on $gettext.
Note!
Strings that include commas must be included in single or
double quotes.
[CheetahGenerator]
This section contains the options for the Cheetah generator. It applies to skin.conf only.
search_list
This is the list of search list objects that will be scanned by the template engine, looking for tags. See the section Defining new tags and the Cheetah documentation for details on search lists. If no search_list is specified, a default list will be used.
search_list_extensions
This defines one or more search list objects that will be appended to the search_list. For example, if you are using the "seven day" and "forecast" search list extensions, the option would look like
search_list_extensions = user.seven_day.SevenDay, user.forecast.ForecastVariables
encoding
As Cheetah goes through the template, it substitutes strings for all tag values. This option controls which encoding to use for the new strings. The encoding can be chosen on a per file basis. All of the encodings listed in the Python documentation Standard Encodings are available, as well as these WeeWX-specific encodings:
| Encoding | Comments |
| html_entities | Non 7-bit characters will be represented as HTML entities (e.g., the degree sign will be represented as °) |
| strict_ascii | Non 7-bit characters will be ignored. |
| normalized_ascii | Replace accented characters with non-accented analogs (e.g., 'ö' will be replaced with 'o'). |
The encoding html_entities is the default. Other common choices are utf8, cp1252 (a.k.a. Windows-1252), and latin1.
template
The name of a template file. A template filename must end with .tmpl. Filenames are case-sensitive. If the template filename has the letters YYYY, MM, WW or DD in its name, these will be substituted for the year, month, week and day of month, respectively. So, a template with the name summary-YYYY-MM.html.tmpl would have name summary-2010-03.html for the month of March, 2010.
generate_once
When set to True, the template is processed only on the first invocation of the report engine service. This feature is useful for files that do not change when data values change, such as HTML files that define a layout. The default is False.
stale_age
File staleness age, in seconds. If the file is older than this age it will be generated from the template. If no stale_age is specified, then the file will be generated every time the generator runs.
Note
Precise control over when a report
is run is available through use of the report_timing option in weewx.conf.
The report_timing option uses a CRON-like setting to control precisely when a
report is run. See the Scheduling reports section for details
on the report_timing option.
[[SummaryByDay]]
The SummaryByDay section defines some special behavior. Each template in this section will be used multiple times, each time with a different per-day timespan. Be sure to include YYYY, MM, and DD in the filename of any template in this section.
[[SummaryByMonth]]
The SummaryByMonth section defines some special behavior. Each template in this section will be used multiple times, each time with a different per-month timespan. Be sure to include YYYY and MM in the filename of any template in this section.
[[SummaryByYear]]
The SummaryByYear section defines some special behavior. Each template in this section will be used multiple times, each time with a different per-year timespan. Be sure to include YYYY in the filename of any template in this section.
[ImageGenerator]
This section describes the various options available to the image generator.
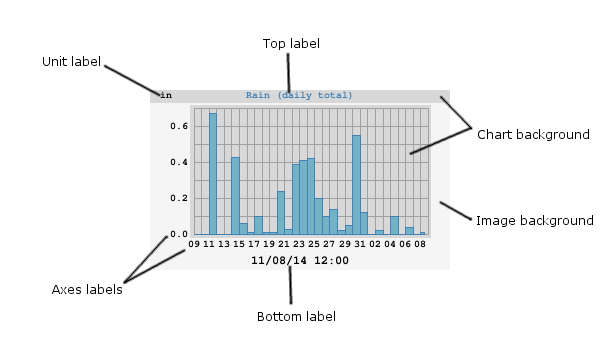
Overall options
These are options that affect the overall image.
anti_alias
Setting to 2 or more might give a sharper image, with fewer jagged edges. Experimentation is in order. Default is 1.
chart_background_color
The background color of the chart itself. Optional. Default is #d8d8d8.
chart_gridline_color
The color of the chart grid lines. Optional. Default is #a0a0a0
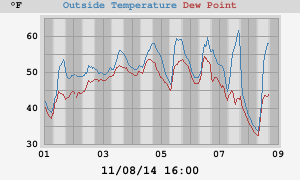
daynight_day_color
The color to be used for the daylight band. Optional. Default is #ffffff.
daynight_edge_color
The color to be used in the transition zone between night and day. Optional. Default is #efefef, a mid-gray.
daynight_night_color
The color to be used for the nighttime band. Optional. Default is #f0f0f0, a dark gray.
image_background_color
The background color of the whole image. Optional. Default is #f5f5f5 ("SmokeGray")
image_width
image_height
The width and height of the image in pixels. Optional. Default is 300 x 180 pixels.
show_daynight
Set to true to show day/night bands in an image. Otherwise, set to false. This only looks good with day or week plots. Optional. Default is false.
skip_if_empty
If set to true, then skip the generation of the image if all data in it are null. If set to a time period, such as month or year, then skip the generation of the image if all data in that period are null. Default is false.
stale_age
Image file staleness age, in seconds. If the image file is older than this age it will be generated. If no stale_age is specified, then the image file will be generated every time the generator runs.
unit
Normally, the unit used in a plot is set by whatever unit group the types are in. However, this option allows overriding the unit used in a specific plot.
Various label options
These are options for the various labels used in the image.
axis_label_font_color
The color of the x- and y-axis label font. Optional. Default is black.
axis_label_font_path
The path to the font to be use for the x- and y-axis labels. Optional. If not given, or if WeeWX cannot find the font, then the default PIL font will be used.
axis_label_font_size
The size of the x- and y-axis labels in pixels. Optional. The default is 10.
bottom_label_font_color
The color of the bottom label font. Optional. Default is black.
bottom_label_font_path
The path to the font to be use for the bottom label. Optional. If not given, or if WeeWX cannot find the font, then the default PIL font will be used.
bottom_label_font_size
The size of the bottom label in pixels. Optional. The default is 10.
bottom_label_format
The format to be used for the bottom label. It should be a strftime format. Optional. Default is '%m/%d/%y %H:%M'.
bottom_label_offset
The margin of the bottom label from the bottom of the plot. Default is 3.
top_label_font_path
The path to the font to be use for the top label. Optional. If not given, or if WeeWX cannot find the font, then the default PIL font will be used.
top_label_font_size
The size of the top label in pixels. Optional. The default is 10.
unit_label_font_color
The color of the unit label font. Optional. Default is black.
unit_label_font_path
The path to the font to be use for the unit label. Optional. If not given, or if WeeWX cannot find the font, then the default PIL font will be used.
unit_label_font_size
The size of the unit label in pixels. Optional. The default is 10.
x_interval
The time interval in seconds between x-axis tick marks. Optional. If not given, a suitable default will be chosen.
x_label_format
The format to be used for the time labels on the x-axis. It should be a strftime format. Optional. If not given, a sensible format will be chosen automatically.
x_label_spacing
Specifies the ordinal increment between labels on the x-axis: For example, 3 means a label every 3rd tick mark. Optional. The default is 2.
y_label_side
Specifies if the y-axis labels should be on the left, right, or both sides of the graph. Valid values are left, right or both. Optional. Default is left.
y_label_spacing
Specifies the ordinal increment between labels on the y-axis: For example, 3 means a label every 3rd tick mark. Optional. The default is 2.
y_nticks
The nominal number of ticks along the y-axis. The default is 10.
Plot scaling options
time_length
The nominal length of the time period to be covered in seconds. The exact length of the x-axis is chosen by the plotting engine to cover this period. Optional. Default is 86400 (one day).
yscale
A 3-way tuple (ylow, yhigh, min_interval), where ylow and yhigh are the minimum and maximum y-axis values, respectively, and min_interval is the minimum tick interval. If set to None, the corresponding value will be automatically chosen. Optional. Default is None, None, None. (Choose the y-axis minimum, maximum, and minimum increment automatically.)
Compass rose options
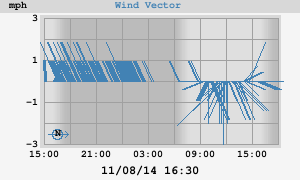
rose_label
The label to be used in the compass rose to indicate due North. Optional. Default is N.
rose_label_font_path
The path to the font to be use for the rose label (the letter "N," indicating North). Optional. If not given, or if WeeWX cannot find the font, then the default PIL font will be used.
rose_label_font_size
The size of the compass rose label in pixels. Optional. The default is 10.
rose_label_font_color
The color of the compass rose label. Optional. Default is the same color as the rose itself.
vector_rotate
Causes the vectors to be rotated by this many degrees. Positive is clockwise. If westerly winds dominate at your location (as they do at mine), then you may want to specify +90 for this option. This will cause the average vector to point straight up, rather than lie flat against the x-axis. Optional. The default is 0.
Shared plot line options
These are options shared by all the plot lines.
chart_line_colors
Each chart line is drawn in a different color. This option is a list of those colors. If the number of lines
exceeds the length of the list, then the colors wrap around to the beginning of the list. Optional. In the
case of bar charts, this is the color of the outline of the bar. Default is #0000ff, #00ff00, #ff0000.
Individual line color can be overridden by using option color.
chart_fill_colors
A list of the color to be used as the fill of the bar charts. Optional. The default is to use the same color as the outline color (option chart_line_colors).
chart_line_width
Each chart line can be drawn using a different line width. This option is a list of these widths. If the
number of lines exceeds the length of the list, then the widths wrap around to the beginning of the list.
Optional. Default is 1, 1, 1.
Individual line widths can be overridden
by using option width.
Individual line options
These are options that are set for individual lines.
aggregate_interval
The time period over which the data should be aggregated, in seconds. Required if aggregate_type has been set. Alternatively, the time can be specified by using one of the "shortcuts" (that is, hour, day, week, month, or year).
aggregate_type
The default is to plot every data point, but this is probably not a good idea for any plot longer than a day. By setting this option, you can aggregate data by a set time interval. Available aggregation types include avg, count, cumulative, diff, last, max, min, sum, and tderiv.
color
This option is to override the color for an individual line. Optional. Default is to use the color in chart_line_colors.
data_type
The SQL data type to be used for this plot line. For more information, see the section Including a type more than once in a plot. Optional. The default is to use the section name.
fill_color
This option is to override the fill color for a bar chart. Optional. Default is to use the color in chart_fill_colors.
label
The label to be used for this plot line in the top label. Optional. The default is to use the SQL variable name.
line_gap_fraction
If there is a gap between data points bigger than this fractional amount of the x-axis, then a gap will be drawn, rather than a connecting line. See Section Line gaps. Optional. The default is to always draw the line.
line_type
The type of line to be used. Choices are solid or none. Optional. Default is solid.
marker_size
The size of the marker. Optional. Default is 8.
marker_type
The type of marker to be used to mark each data point. Choices are cross, x, circle, box, or none. Optional. Default is none.
plot_type
The type of plot for this line. Choices are line, bar, or vector. Optional. Default is line.
width
This option is to override the line widthfor an individual line. Optional. Default is to use the width in chart_line_width.
[CopyGenerator]
This section is used by generator weewx.reportengine.CopyGenerator and controls which files are to be copied over from the skin directory to the destination directory. Think of it as "file generation," except that rather than going through the template engine, the files are simply copied over.
copy_once
This option controls which files get copied over on the first invocation of the report engine service. Typically, this is things such as style sheets or background GIFs. Wildcards can be used.
copy_always
This is a list of files that should be copied on every invocation. Wildcards can be used.
Here is the [CopyGenerator] section from the Standard skin.conf
[CopyGenerator]
    # This section is used by the generator CopyGenerator

    # List of files to be copied only the first time the generator runs
    copy_once = backgrounds/*, weewx.css, mobile.css, favicon.ico

    # List of files to be copied each time the generator runs
    # copy_always =
The Standard skin includes some background images, CSS files, and icons that need to be copied once. There are no files that need to be copied every time the generator runs.
[Generators]
This section defines the list of generators that should be run.
generator_list
This option controls which generators get run for this skin. It is a comma separated list. The generators will be run in this order.
Here is the [Generators] section from the Standard skin.conf
[Generators]
    generator_list = weewx.cheetahgenerator.CheetahGenerator, weewx.imagegenerator.ImageGenerator, weewx.reportengine.CopyGenerator
The Standard skin uses three generators: CheetahGenerator, ImageGenerator, and CopyGenerator.
Appendix
Aggregation types
| Aggregation type | Meaning |
| avg | The average value in the aggregation period. |
| avg_ge(val) | The number of days where the average value is greater than or equal to val. Aggregation period must be one day or longer. The argument val is a ValueTuple. |
| avg_le(val) | The number of days where the average value is less than or equal to val. Aggregation period must be one day or longer. The argument val is a ValueTuple. |
| count | The number of non-null values in the aggregation period. |
| diff | The difference between the last and first value in the aggregation period. |
| exists | Returns True if the observation type exists in the database. |
| first | The first non-null value in the aggregation period. |
| firsttime | The time of the first non-null value in the aggregation period. |
| gustdir | The direction of the max gust in the aggregation period. |
| has_data | Returns True if the observation type exists in the database and is non-null. |
| last | The last non-null value in the aggregation period. |
| lasttime | The time of the last non-null value in the aggregation period. |
| max | The maximum value in the aggregation period. |
| maxmin | The maximum daily minimum in the aggregation period. Aggregation period must be one day or longer. |
| maxmintime | The time of the maximum daily minimum. |
| maxsum | The maximum daily sum in the aggregation period. Aggregation period must be one day or longer. |
| maxsumtime | The time of the maximum daily sum. |
| maxtime | The time of the maximum value. |
| max_ge(val) | The number of days where the maximum value is greater than or equal to val. Aggregation period must be one day or longer. The argument val is a ValueTuple. |
| max_le(val) | The number of days where the maximum value is less than or equal to val. Aggregation period must be one day or longer. The argument val is a ValueTuple. |
| meanmax | The average daily maximum in the aggregation period. Aggregation period must be one day or longer. |
| meanmin | The average daily minimum in the aggregation period. Aggregation period must be one day or longer. |
| min | The minimum value in the aggregation period. |
| minmax | The minimum daily maximum in the aggregation period. Aggregation period must be one day or longer. |
| minmaxtime | The time of the minimum daily maximum. |
| minsum | The minimum daily sum in the aggregation period. Aggregation period must be one day or longer. |
| minsumtime | The time of the minimum daily sum. |
| mintime | The time of the minimum value. |
| min_ge(val) | The number of days where the minimum value is greater than or equal to val. Aggregation period must be one day or longer. The argument val is a ValueTuple. |
| min_le(val) | The number of days where the minimum value is less than or equal to val. Aggregation period must be one day or longer. The argument val is a ValueTuple. |
| not_null | Returns truthy if any value over the aggregation period is non-null. |
| rms | The root mean square value in the aggregation period. |
| sum | The sum of values in the aggregation period. |
| sum_ge(val) | The number of days where the sum of value is greater than or equal to val. Aggregation period must be one day or longer. The argument val is a ValueTuple. |
| sum_le(val) | The number of days where the sum of value is less than or equal to val. Aggregation period must be one day or longer. The argument val is a ValueTuple. |
| tderiv | The time derivative between the last and first value in the aggregation period. This is the difference in value divided by the difference in time. |
| vecavg | The vector average speed in the aggregation period. |
| vecdir | The vector averaged direction during the aggregation period. |
Units
WeeWX offers three different unit systems:
| Name | Encoded value | Note |
| US | 0x01 | U.S. Customary |
| METRICWX | 0x11 | Metric, with rain related measurements in mm and speeds in m/s |
| METRIC | 0x10 | Metric, with rain related measurements in cm and speeds in km/hr |
The table below lists all the unit groups, their members, which units are options for the group, and what the defaults are for each standard unit system.
| Group | Members | Unit options | US | METRICWX | METRIC |
| group_altitude | altitude cloudbase |
foot meter |
foot | meter | meter |
| group_amp | amp | amp | amp | amp | |
| group_boolean | boolean | boolean | boolean | boolean | |
| group_concentration | no2 pm1_0 pm2_5 pm10_0 |
microgram_per_meter_cubed | microgram_per_meter_cubed | microgram_per_meter_cubed | microgram_per_meter_cubed |
| group_count | leafWet1 leafWet2 lightning_disturber_count lightning_noise_count lightning_strike_count |
count | count | count | count |
| group_data | byte bit |
byte | byte | byte | |
| group_db | noise | dB | dB | dB | dB |
| group_delta_time | daySunshineDur rainDur sunshineDurDoc |
second minute hour day |
second | second | second |
| group_degree_day | cooldeg heatdeg growdeg |
degree_F_day degree_C_day |
degree_F_day | degree_C_day | degree_C_day |
| group_direction | gustdir vecdir windDir windGustDir |
degree_compass | degree_compass | degree_compass | degree_compass |
| group_distance | windrun lightning_distance |
mile km |
mile | km | km |
| group_energy | kilowatt_hour mega_joule watt_hour watt_second |
watt_hour | watt_hour | watt_hour | |
| group_energy2 | kilowatt_hour watt_hour watt_second |
watt_second | watt_second | watt_second | |
| group_fraction | co co2 nh3 o3 pb so2 |
ppm | ppm | ppm | ppm |
| group_frequency | hertz | hertz | hertz | hertz | |
| group_illuminance | illuminance | lux | lux | lux | lux |
| group_interval | interval | minute | minute | minute | minute |
| group_length | inch cm |
inch | cm | cm | |
| group_moisture | soilMoist1 soilMoist2 soilMoist3 soilMoist4 |
centibar | centibar | centibar | centibar |
| group_percent |
cloudcover extraHumid1 extraHumid2 inHumidity outHumidity pop rxCheckPercent snowMoisture |
percent | percent | percent | percent |
| group_power | kilowatt watt |
watt | watt | watt | |
| group_pressure |
barometer altimeter pressure |
inHg mbar hPa kPa |
inHg | mbar | mbar |
| group_pressurerate |
barometerRate altimeterRate pressureRate |
inHg_per_hour mbar_per_hour hPa_per_hour kPa_per_hour |
inHg_per_hour | mbar_per_hour | mbar_per_hour |
| group_radiation | maxSolarRad radiation |
watt_per_meter_squared | watt_per_meter_squared | watt_per_meter_squared | watt_per_meter_squared |
| group_rain | rain ET hail snowDepth snowRate |
inch cm mm |
inch | mm | cm |
| group_rainrate | rainRate hailRate |
inch_per_hour cm_per_hour mm_per_hour |
inch_per_hour | mm_per_hour | cm_per_hour |
| group_speed | wind windGust windSpeed windgustvec windvec |
mile_per_hour km_per_hour knot meter_per_second beaufort |
mile_per_hour | meter_per_second | km_per_hour |
| group_speed2 | rms vecavg |
mile_per_hour2 km_per_hour2 knot2 meter_per_second2 |
mile_per_hour2 | meter_per_second2 | km_per_hour2 |
| group_temperature | appTemp dewpoint extraTemp1 extraTemp2 extraTemp3 heatindex heatingTemp humidex inTemp leafTemp1 leafTemp2 outTemp soilTemp1 soilTemp2 soilTemp3 soilTemp4 windchill THSW |
degree_C degree_F degree_E degree_K |
degree_F | degree_C | degree_C |
| group_time | dateTime | unix_epoch dublin_jd |
unix_epoch | unix_epoch | unix_epoch |
| group_uv | UV | uv_index | uv_index | uv_index | uv_index |
| group_volt | consBatteryVoltage heatingVoltage referenceVoltage supplyVoltage |
volt | volt | volt | volt |
| group_volume | cubic_foot gallon liter |
gallon | liter | liter | |
| group_NONE | NONE | NONE | NONE | NONE | NONE |
Class ValueTuple
A value, along with the unit it is in, can be represented by a 3-way tuple called a "value tuple". They are used throughout WeeWX. All WeeWX routines can accept a simple unadorned 3-way tuple as a value tuple, but they return the type ValueTuple. It is useful because its contents can be accessed using named attributes. You can think of it as a unit-aware value, useful for converting to and from other units.
The following attributes, and their index, are present:
| Index | Attribute | Meaning |
| 0 | value | The data value(s). Can be a series (e.g., [20.2, 23.2, ...]) or a scalar (e.g., 20.2) |
| 1 | unit | The unit it is in ("degree_C") |
| 2 | group | The unit group ("group_temperature") |
It is valid to have a datum value of None.
It is also valid to have a unit type of None (meaning there is no information about the unit the value is in). In this case, you won't be able to convert it to another unit.
Here are some examples:
from weewx.units import ValueTuple

freezing_vt = ValueTuple(0.0, "degree_C", "group_temperature")
body_temperature_vt = ValueTuple(98.6, "degree_F", group_temperature")
station_altitude_vt = ValueTuple(120.0, "meter", "group_altitude")
Class ValueHelper
Class ValueHelper contains all the information necessary to do the proper formatting of a value, including a unit label.
Instance attribute
ValueHelper.value_t
Returns the ValueTuple instance held internally.
Instance methods
ValueHelper.__str__()
Formats the value as a string, including a unit label, and returns it.
ValueHelper.format(format_string=None, None_string=None, add_label=True, localize=True)
Format the value as a string, using various specified options, and return it. Unless otherwise specified, a label is included.
format_string A string to be used for formatting. It must include one, and only one, format specifier.
None_string In the event of a value of Python None, this string will be substituted. If None, then a default string from skin.conf will be used.
add_label If truthy, then an appropriate unit label will be attached. Otherwise, no label is attached.
localize If truthy, then the results will be localized. For example, in some locales, a comma will be used as the decimal specifier.